VV/VW boards - are there any DIY projects?

I’ve found a few UK based web shops, one of them even sells some of Big Al’s boards and now i have a few questions:

When i was looking at the ModMeter V2 board i realized that there are 2 different types of boards. What’s the difference between the smart pwm boards and what they call “P-FET” boards? Aren’t both pulse modulating?

Are you building your mods with charging sockets or are you using an external charger for the 18650s? Are there other things to consider apart from the space a charger board uses in the box?

I’m half way through my shopping list but can’t decide on a board. Can you give me a few of your thoughts on the pros and cons? Sled mounted vs box mounted? OKL vs Raptor vs Big Al’s vs smart pwm?

Sorry for the bombardment…

1 Like

You’re fine, brother…ask, and I’ll answer when I can. In this case, I have a few moments before I start my next build, so here goes:
First of all, the Smart Pwm v2.2 is not just a pwm board, its a specific board, a specific maker, basically the “brand name” of Voltrove Electronics. And it has features not normally found in pwm boards.
P-fet boards, if I’m not mistaken, are basically unregulated boards…unless, of course, its on a pwm board. I’m still kinda new and my biggest problem is that I’m not, in any way, versed in electronics. So I get lost in the language of electronics.
So, in essence, pwm boards can be adjusted through the potentiometer. And they pulse. And I’m guessing p-fet boards are constant, depending on battery capacity.
Next…I am not building any kinds of chargers in my mods and the reason for that, is balance charging is not that simple and it requires a little bit more components. So I charge my 18650s externally.
Next…sled mount and box mount.
Mostly preference, I would say. The sled mount is simple, easy and out of the way, but you are limited to that build. And, of course, the other option, you can do what you want. I, personally, like both, but when I mount my boards myself, I usually epoxy the board directly behind the 510 connector, completely out of the way and super clean looking. I had to try all the different styles and methods myself and will continue to do so. I recommend trying at least a couple of different methods, if finances allow it.
Next…from what I can gather, OKL and raptor boards are somewhat limited in wattage output, so that could be a deterrent…also, some of those boards can be a little bulky. Pwm boards have higher potential output and lots of them are tiny.
As far as Big Al’s and the Smart Pwm v2.2…Big Al’s board is a straight forward pwm board, no features. BUT, Big Al is coming out with a new board, the IPWM board, which will have features like the Smart Pwm v2.2.
I like both boards, I really do. But if I had to choose one over the other, than the Smart Pwm v2. 2 would be my choice and probably mostly for features like low voltage cutoff, on/off and, probably my favorite, voltage output lock…meaning you can lock your output voltage and the board will compensate for battery sag.

So, to wrap it up…get your fingers dirty, try things out, find what you like.
Note: Big Al’s boards are easy to wire voltmeters to, so that’s a plus!

Any other questions? Hit me!
1 Like

Now what you need to do is hold a Saturday class so we can alll show up and build some mods together. Mod building in the morning and BBQ’n’vape in the afternoon.

3 Likes

Great idea! I’m just afraid the choice of location would be tricky. However, I invite everyone who’s interested for a Saturday mod building and bbq session. We can even use the workshops in the school where I work. I’ll provide the food but you have to buy your own flight ticket to England!

3 Likes

Just ordered the parts for an OKL2-T/20 mod. I also found (and ordered) this:
http://www.modmaker.co.uk/Mod-Making-Supplies/PCBs/PWM-Side-Mounted-PCB-With-Digital-Pot
Yeah, let’s jump straight in, play the A-Team music…

1 Like

did you already get the parts to populate that PWM board?

Yes, I’ve ordered all the parts I need for the boards from Digikey. One of the MOSFETs is not in stock so it will take about 10 days for them to send the whole order.

1 Like

I just hope I’ve ordered the right parts… I mean not the parts for the boards but things like the enclosure, the fire button and the 510 connector. It should be fine but there are so many different ones…
And I’ve also bought a circuit board to mount the OKL module and switches so there are barely any wires.

1 Like

if you wanna post your parts ordered list(like the enclosure etc) i could look over it and give you an opinion. Will it be 18650s? did you order the battery sled?

1 Like

http://www.modmaker.co.uk/Mod-Making-Supplies/PCBs/OKL2-T20-PCB-For-1590G
http://www.modmaker.co.uk/Mod-Making-Supplies/510-Connectors/Fat-Daddy-Vapes-510-V3-Short-Body
http://www.modmaker.co.uk/Mod-Making-Supplies/Enclosures/ModMakerBox-GBoy-Plus-Blue-Anodised-Aluminium
http://www.modmaker.co.uk/Mod-Making-Supplies/Switches/12mm-Stainless-Steel-Clicky-Switch-With-Flat-Flush-Actuator

I also ordered a battery sled just in case the 1590 board doesn’t work for some reason. But I really like the idea to put all the components onto a pcb instead of wiring it all together.

OK can somebody please take my credit card off me? I have just ordered parts for a 1x18650 DNA75 mod…

Received the first delivery yesterday and immediately found my first mistake: bought the wrong 510 connector. Got the small version which is only good if you drill out the enclosure to make it sit flush. Gotta get the 22mm version.

Let’s get started then… All the parts for the DNA75 are there so I’ll build that one first.
I love the green pcb, it should make the build look very clean if i don’t f*ck up the soldering.
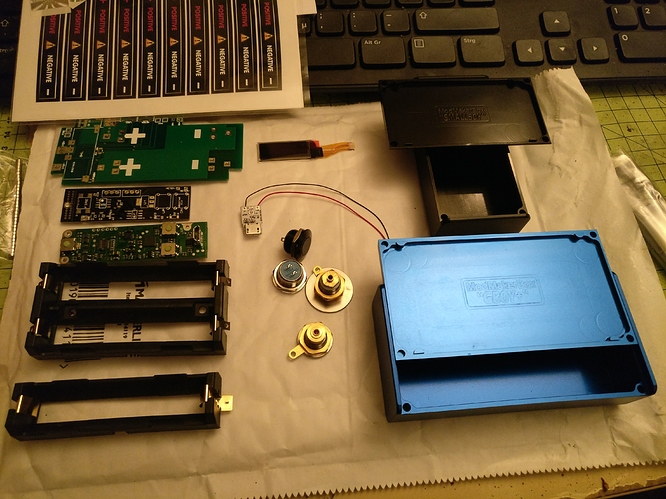
I hope i get the DNA mod into this black enclosure. It’s exactly the size of a dual 18650 sled. The blue one is for the OKL build. It is wider than a dual 18650 sled and a bit higher. The green pcb fits perfectly.
The black PCB is the base for a PWM regulator with a digital pot so you set the voltage with tactile buttons instead of an analogue pot.

3 Likes

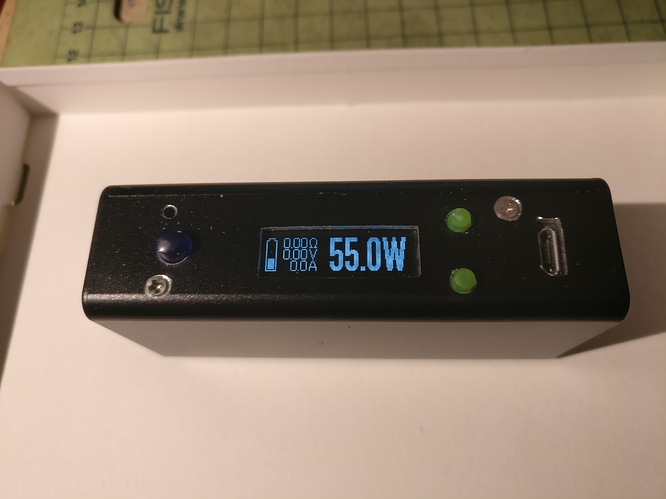
Just finished my first mod! It’s working well but i have to get my head around the dna75 and the software for the PC.
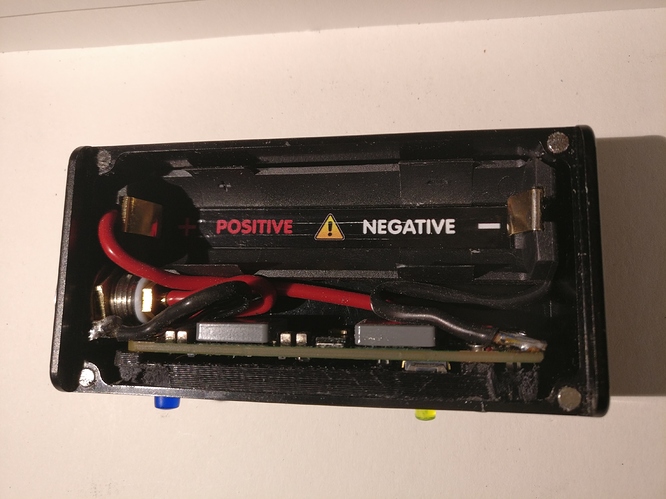
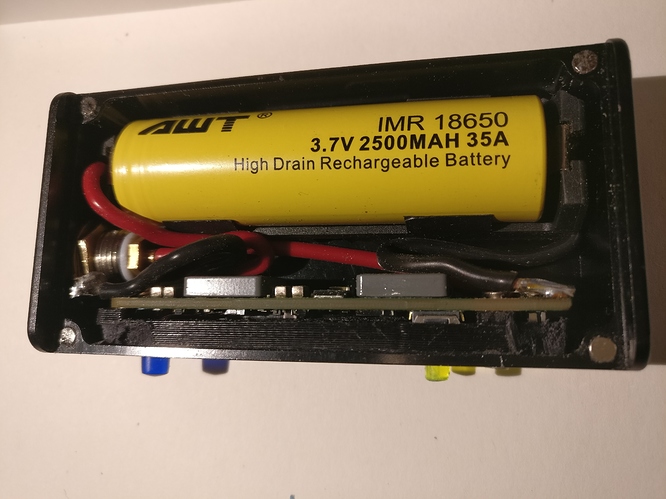
Everything fits into the small enclosure i chose which was a bit of a gamble.The 510 connector had to be moved so the hole for it is more like an egg shaped one. But it’s well hidden under the top plate of the connector so no problem here.
The cutouts for the buttons, the display and the USB connector were a real problem though. I just cant drill that precise with my shitty old dremel (which by the way gave up on this project, RIP). And i thought I’ll safe the money for the actuator buttons. Big mistake. I only had blue and yellow plexiglas rods and not really the right tools for the job so that looks a bit funny. If i can find black screws and proper buttons i think it’s not too bad. Nothing anybody would buy from me but great to have around.
For the next DNA mod i will use a bigger enclosure to fit 2 18650s so i will have space for proper fire button and i can use tactile switches in the enclosure instead of the buttons on the board.


7 Likes

Nice! This is how we learn, so appreciate the share. wipe the screw heads with some alcohol (degrease) and use a Sharpie Pen to hide any exposed metal

3 Likes

That looks absolutely fine for a first build. Critique yourself, learn, grow, and do better on the next one. You want some practice? Pull them wires and shorten em! That takes patience and skill!
My first build was a DNA200 and it was horrendous! And I did the same thing by not ordering actuators…my brother in law made me some out of some SS bolts on his lathe. My wires were all long and tangled…after a couple builds under my belt, I revisited my first build and tidied it up a bit. It made me feel much better!
Sorry it took me so long to see this!
Tag me in your future builds…I’d love to follow you!

3 Likes

No worries @Whiterose0818, i have a feeling this is going to become a long term thing so no rush on the updates… I’ll ask if i have a question. And I’m happy to tag you on future updates.
I know it looks a bit messy with the longer leads but it I’ve decided to leave them a bit longer in this box because i will take it apart again. I have to replace the actuators eventually and rebuild the part of the black plastic mount i accidentally cut off. this is where the 3rd screw goes.
And to be honest, soldering the 510 connector with short leads so close to the board is a proper challenge. it’s either fiddling with the tweezers in a really small space or soldering it before putting it into the enclosure.
I built this mod to have a small one i can mainly use with my MTL tank which runs under 20 watts. Even the crown runs on it for quite a while on one battery. The next mods will definitely be bigger so there should be more space for a cleaner wiring, even with the thicker wire required for higher currents.In this one I’ve used 1.5mm² wire (no idea what AWG that is) but it should be fine for the 75W on the DNA.

The mod website delivers very fast but digikey just sent me an email that the parts will be delayed again so I’ll order a few more parts to get started with a pwm board. Please don’t get your lawyers send me copyright stuff but i think the PWMmod will look similar to yours. Not so nice obviously :grinning:

Where did you find these linear pots like the one in Pugs’ mod?

1 Like

Digikey and mouser both have em.
Just type in slide pot.
If you need links, let me know and I’ll send you some. I recently also found slide pots with LEDs built in…how cool is that.
When you find the slide pot, read the data sheet and you will find a key on deciphering the part number. Length of travel, height of tab, resistance, everything…that way you get the right one. And, of course, I’ll help if you need it!

3 Likes

So… moved over from the raffle thread @Whiterose0818
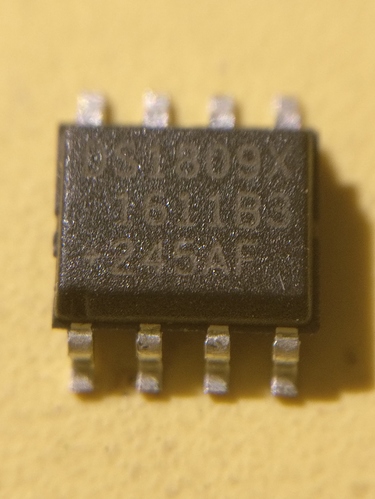
The part is this:
DS1809Z-010±ND from digikey

2 Likes

I will take a look at it and ask a friend or 7…I’ll let ya know what I find.