Crown Stock Coil Rebuild

After a successful rebuild of a Triforce stock coil, I gave the Crown coil a shot. Here’s how I did it…

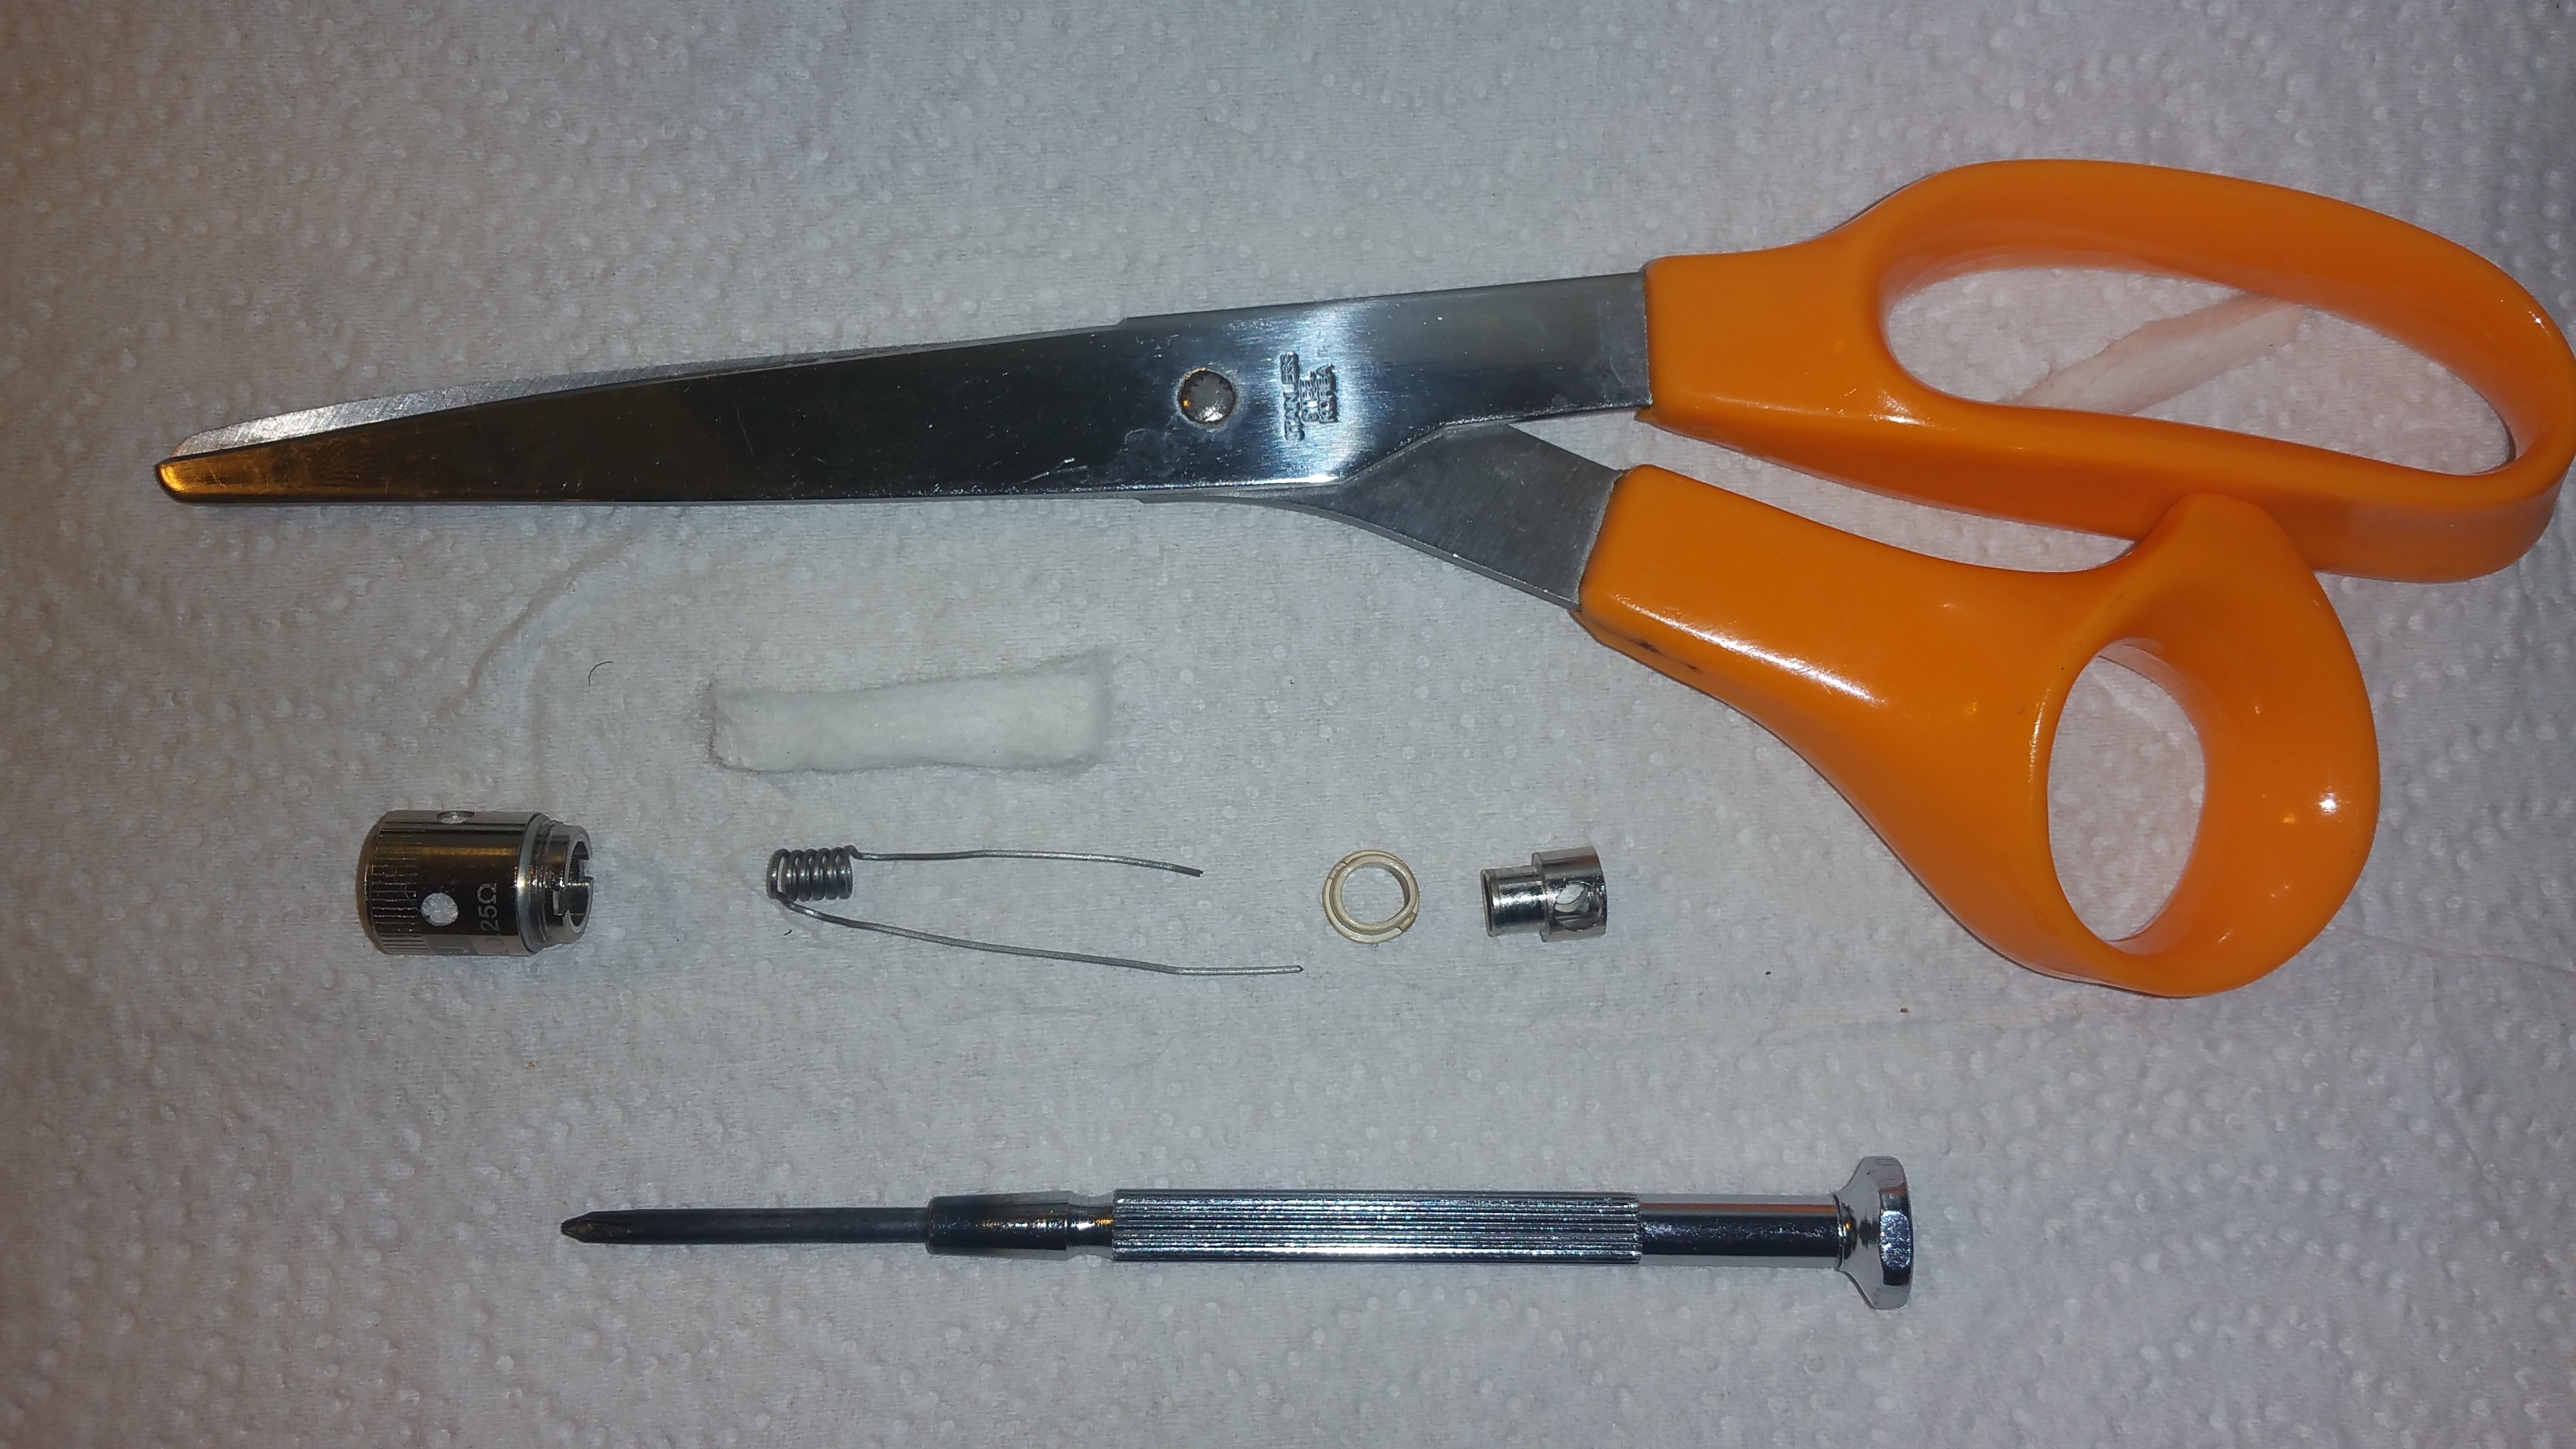
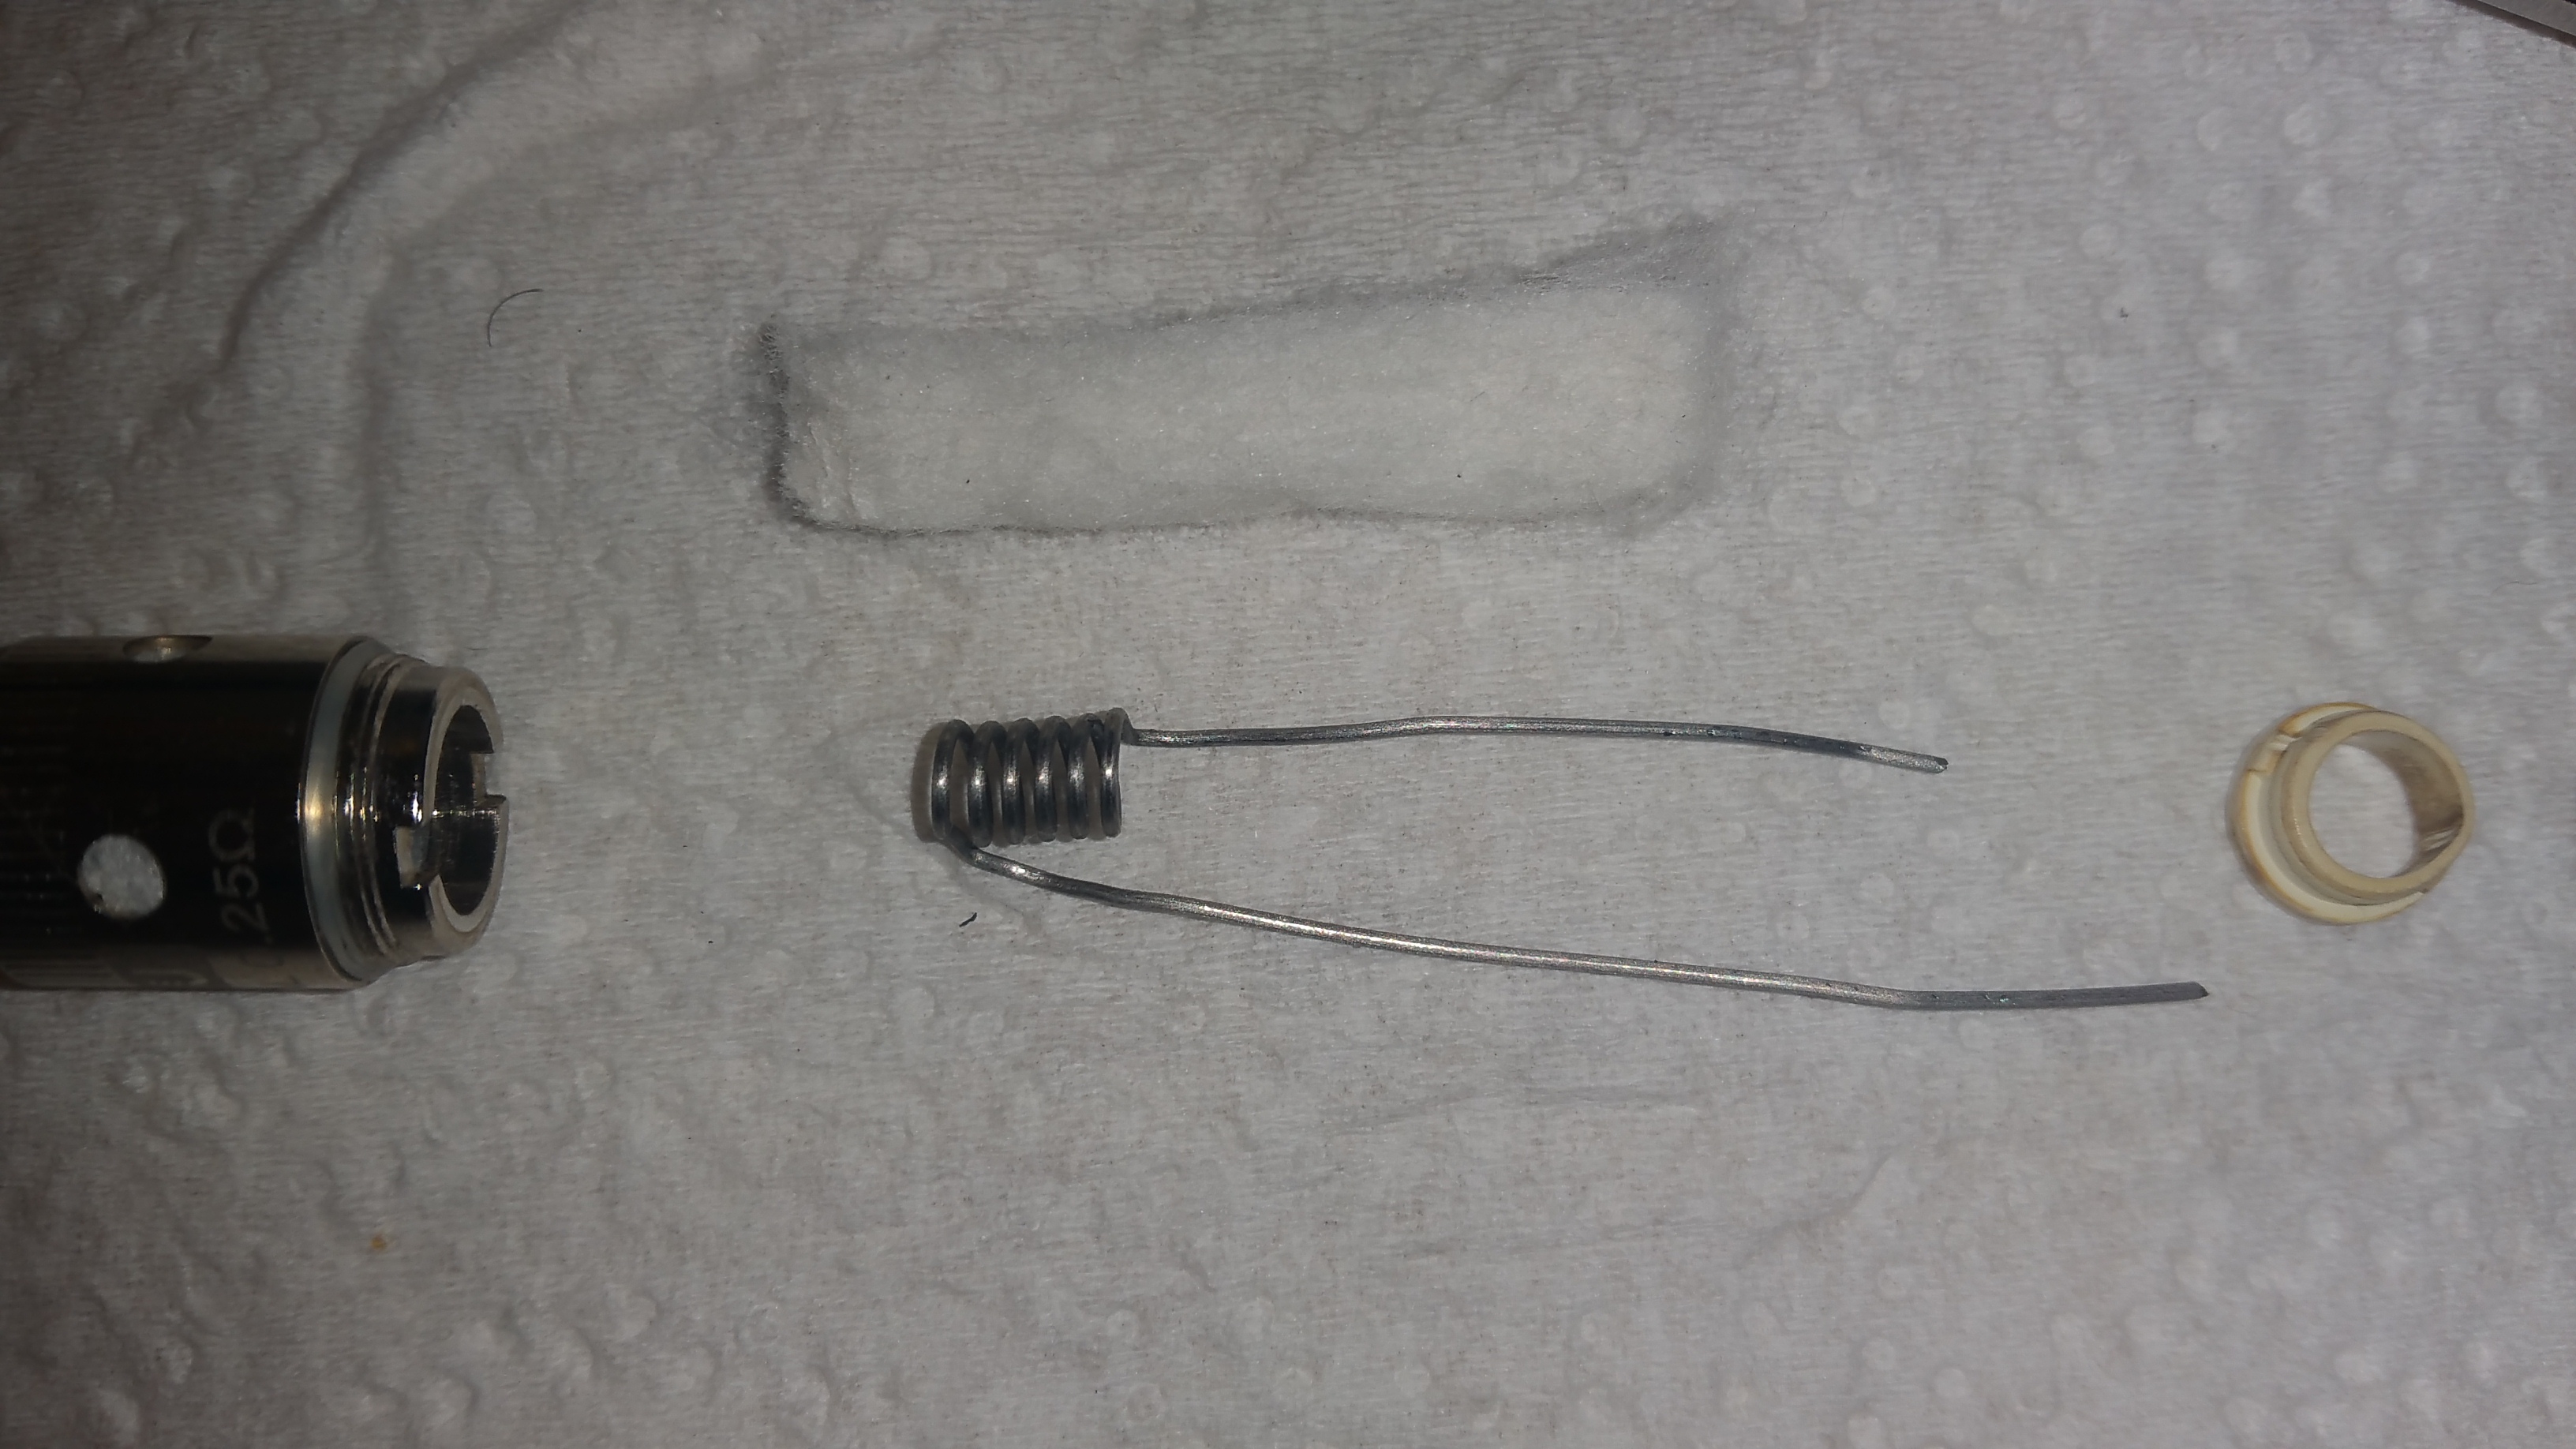
Disassemble your stock coil retaining the coil head, the metal contact pin and the rubber insulator. Remove all the cotton except the cotton covering the juice flow holes.

Make a 6-8 wrap 4-5mm ID spaced coil with long legs. A small ID will have a more restricted air low.

Cut 1/4 to 1/3 inch wide by 2 1/2 inch long strip of cotton. Try not to fluff it.

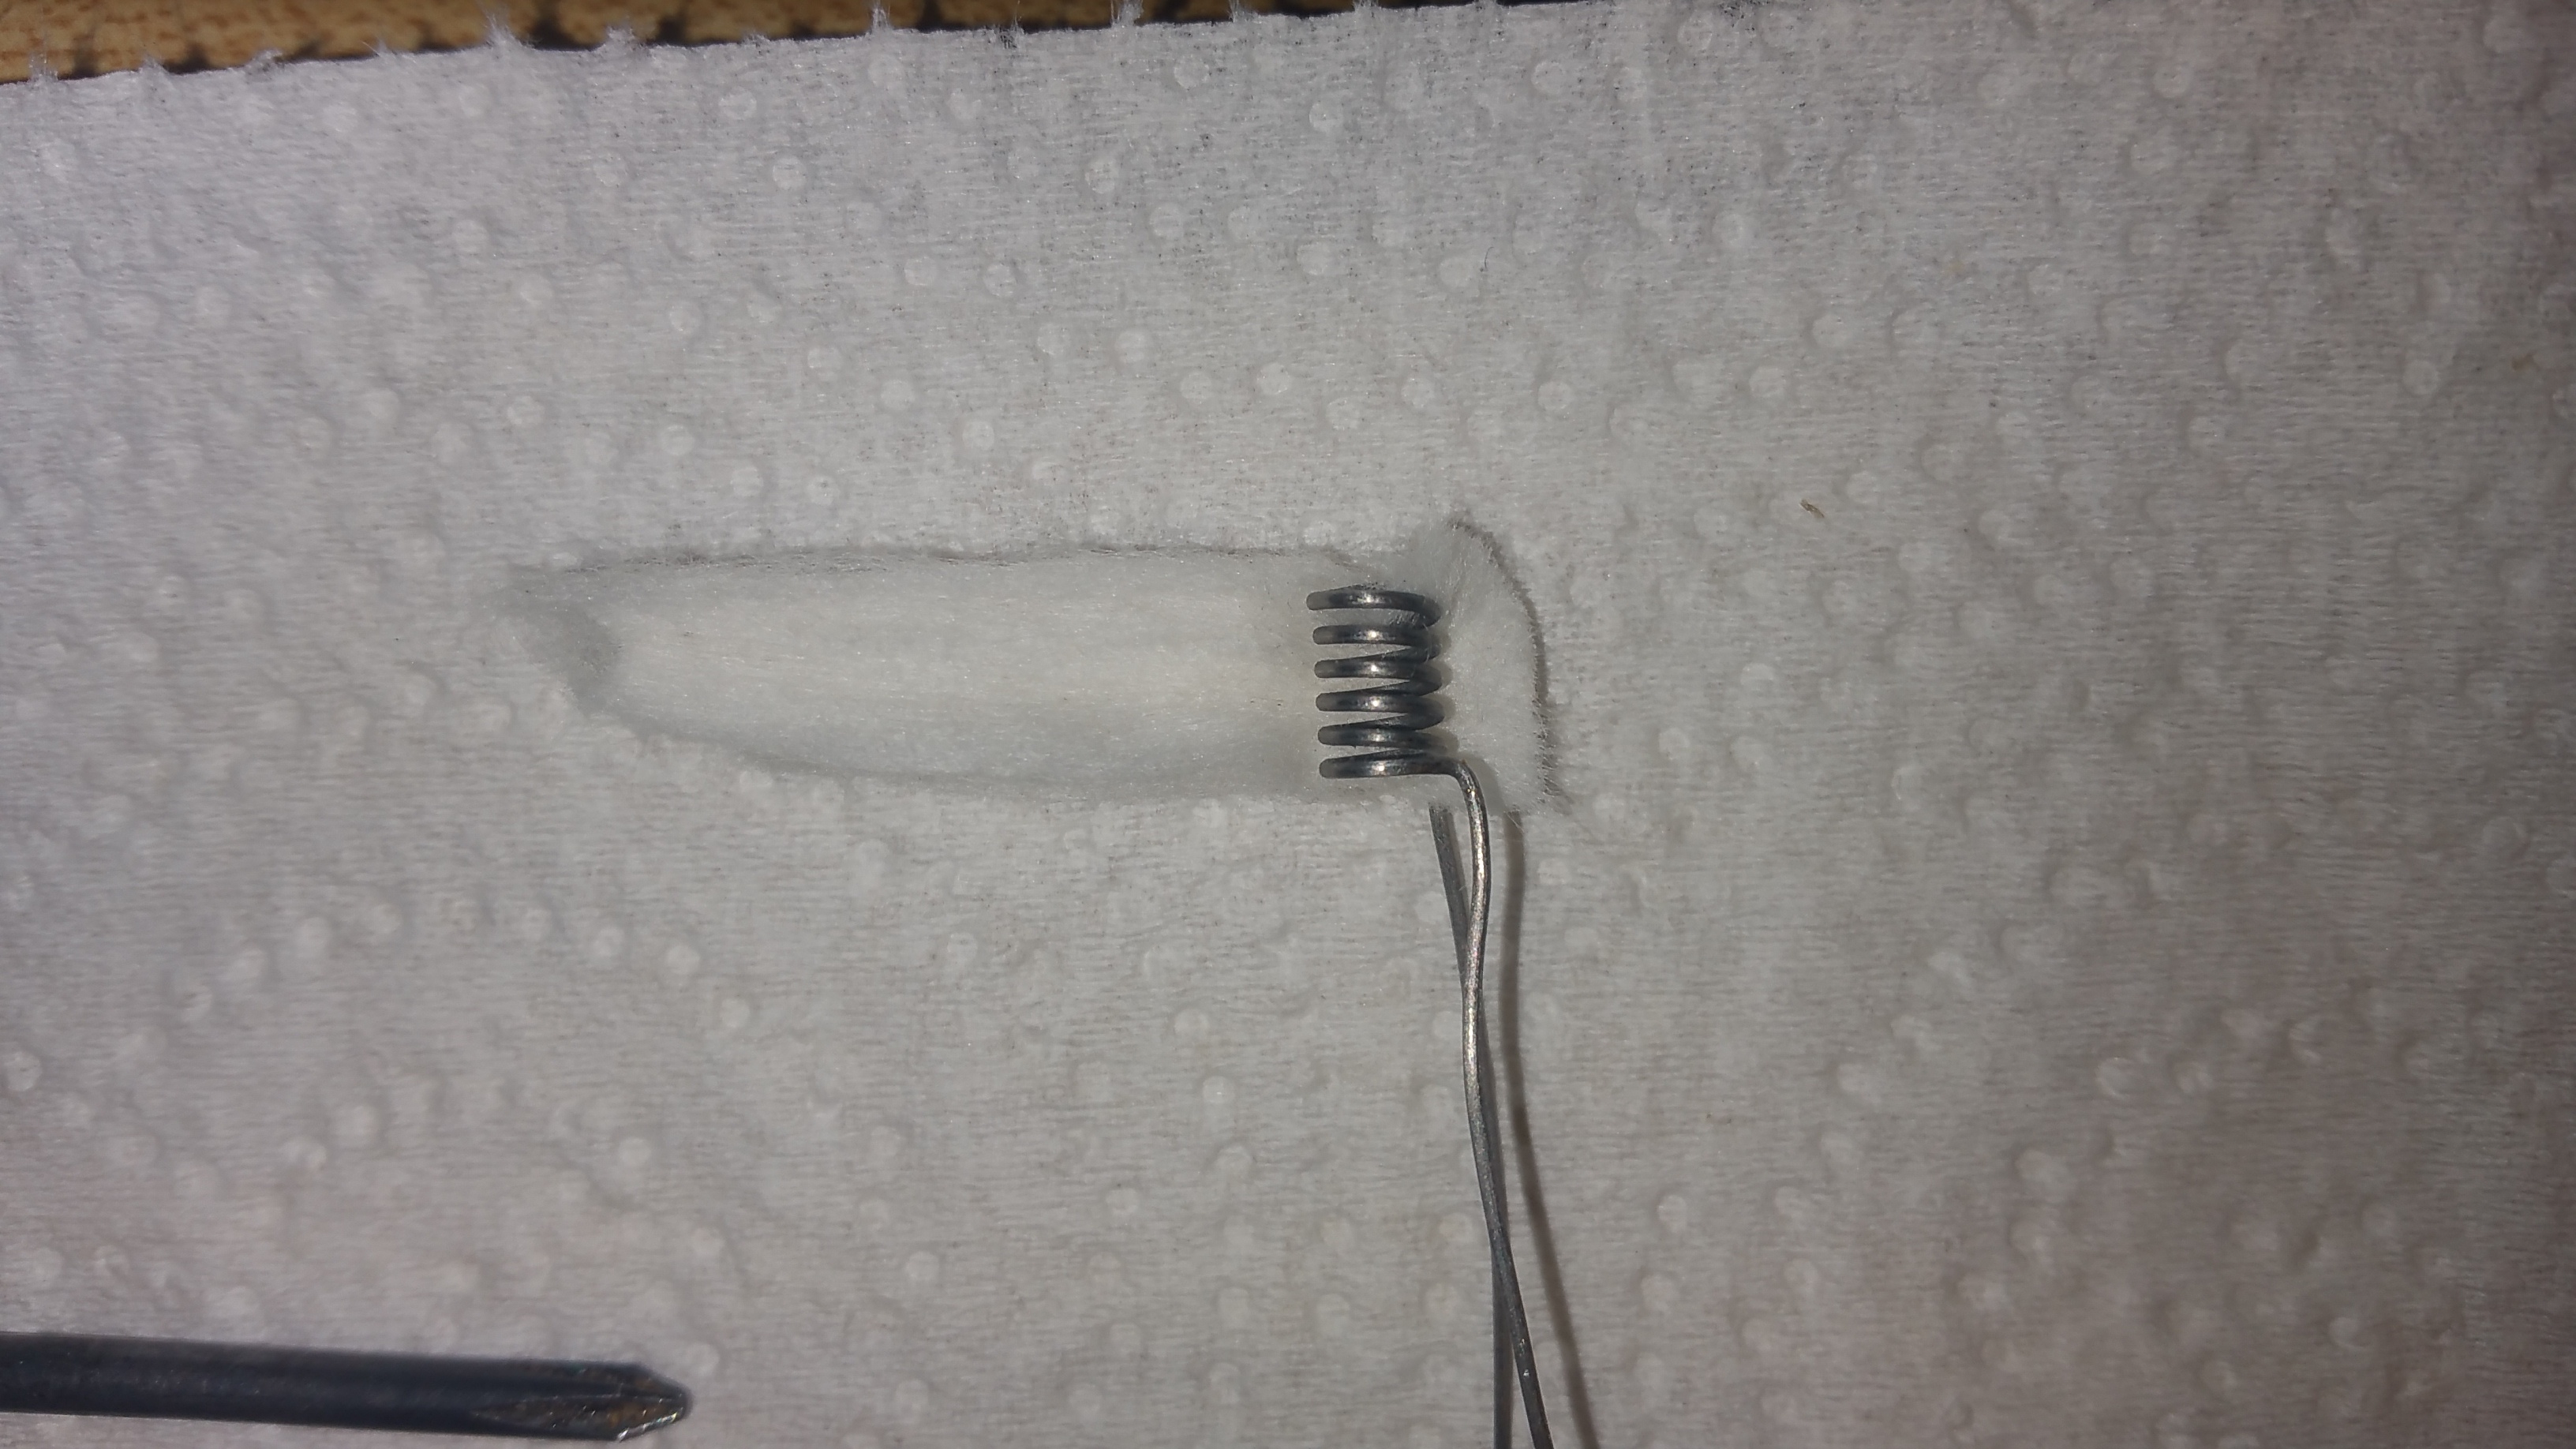
Insert your wrapping tool and carefully bend the legs in the same direction on opposite sides of the coil. I make sure the outer wire is a bit longer than the inner wire. This will be important later

Pin your cotton under outer leg and reinsert your wrapping tool. Make two complete tight wraps of cotton around the coil. Try not to have too much excess cotton above and below the coil. It will block your air flow.

TIP @quitter1 says if you wet your cotton with eliquid it will be easier to form and wrap.
Sounds good to me… I’m adapting his method on my next rebuild. Thanks for the tip @quitter1!

Make sure the outer leg doesn’t make contact with your coil. Not only is the cotton your wick… it’s also your coil insulator.

Your coil should look similar to the photo below. Now insert your new coil into the coil head. It may be a bit snug going in so twist it in a direction that you wrapped your cotton, so your cotton doesn’t unravel.

Once it’s in, apply a little extra pressure in order to pack the cotton a little.

If you can’t get your coil to go in, unravel one wrap of cotton and try again.

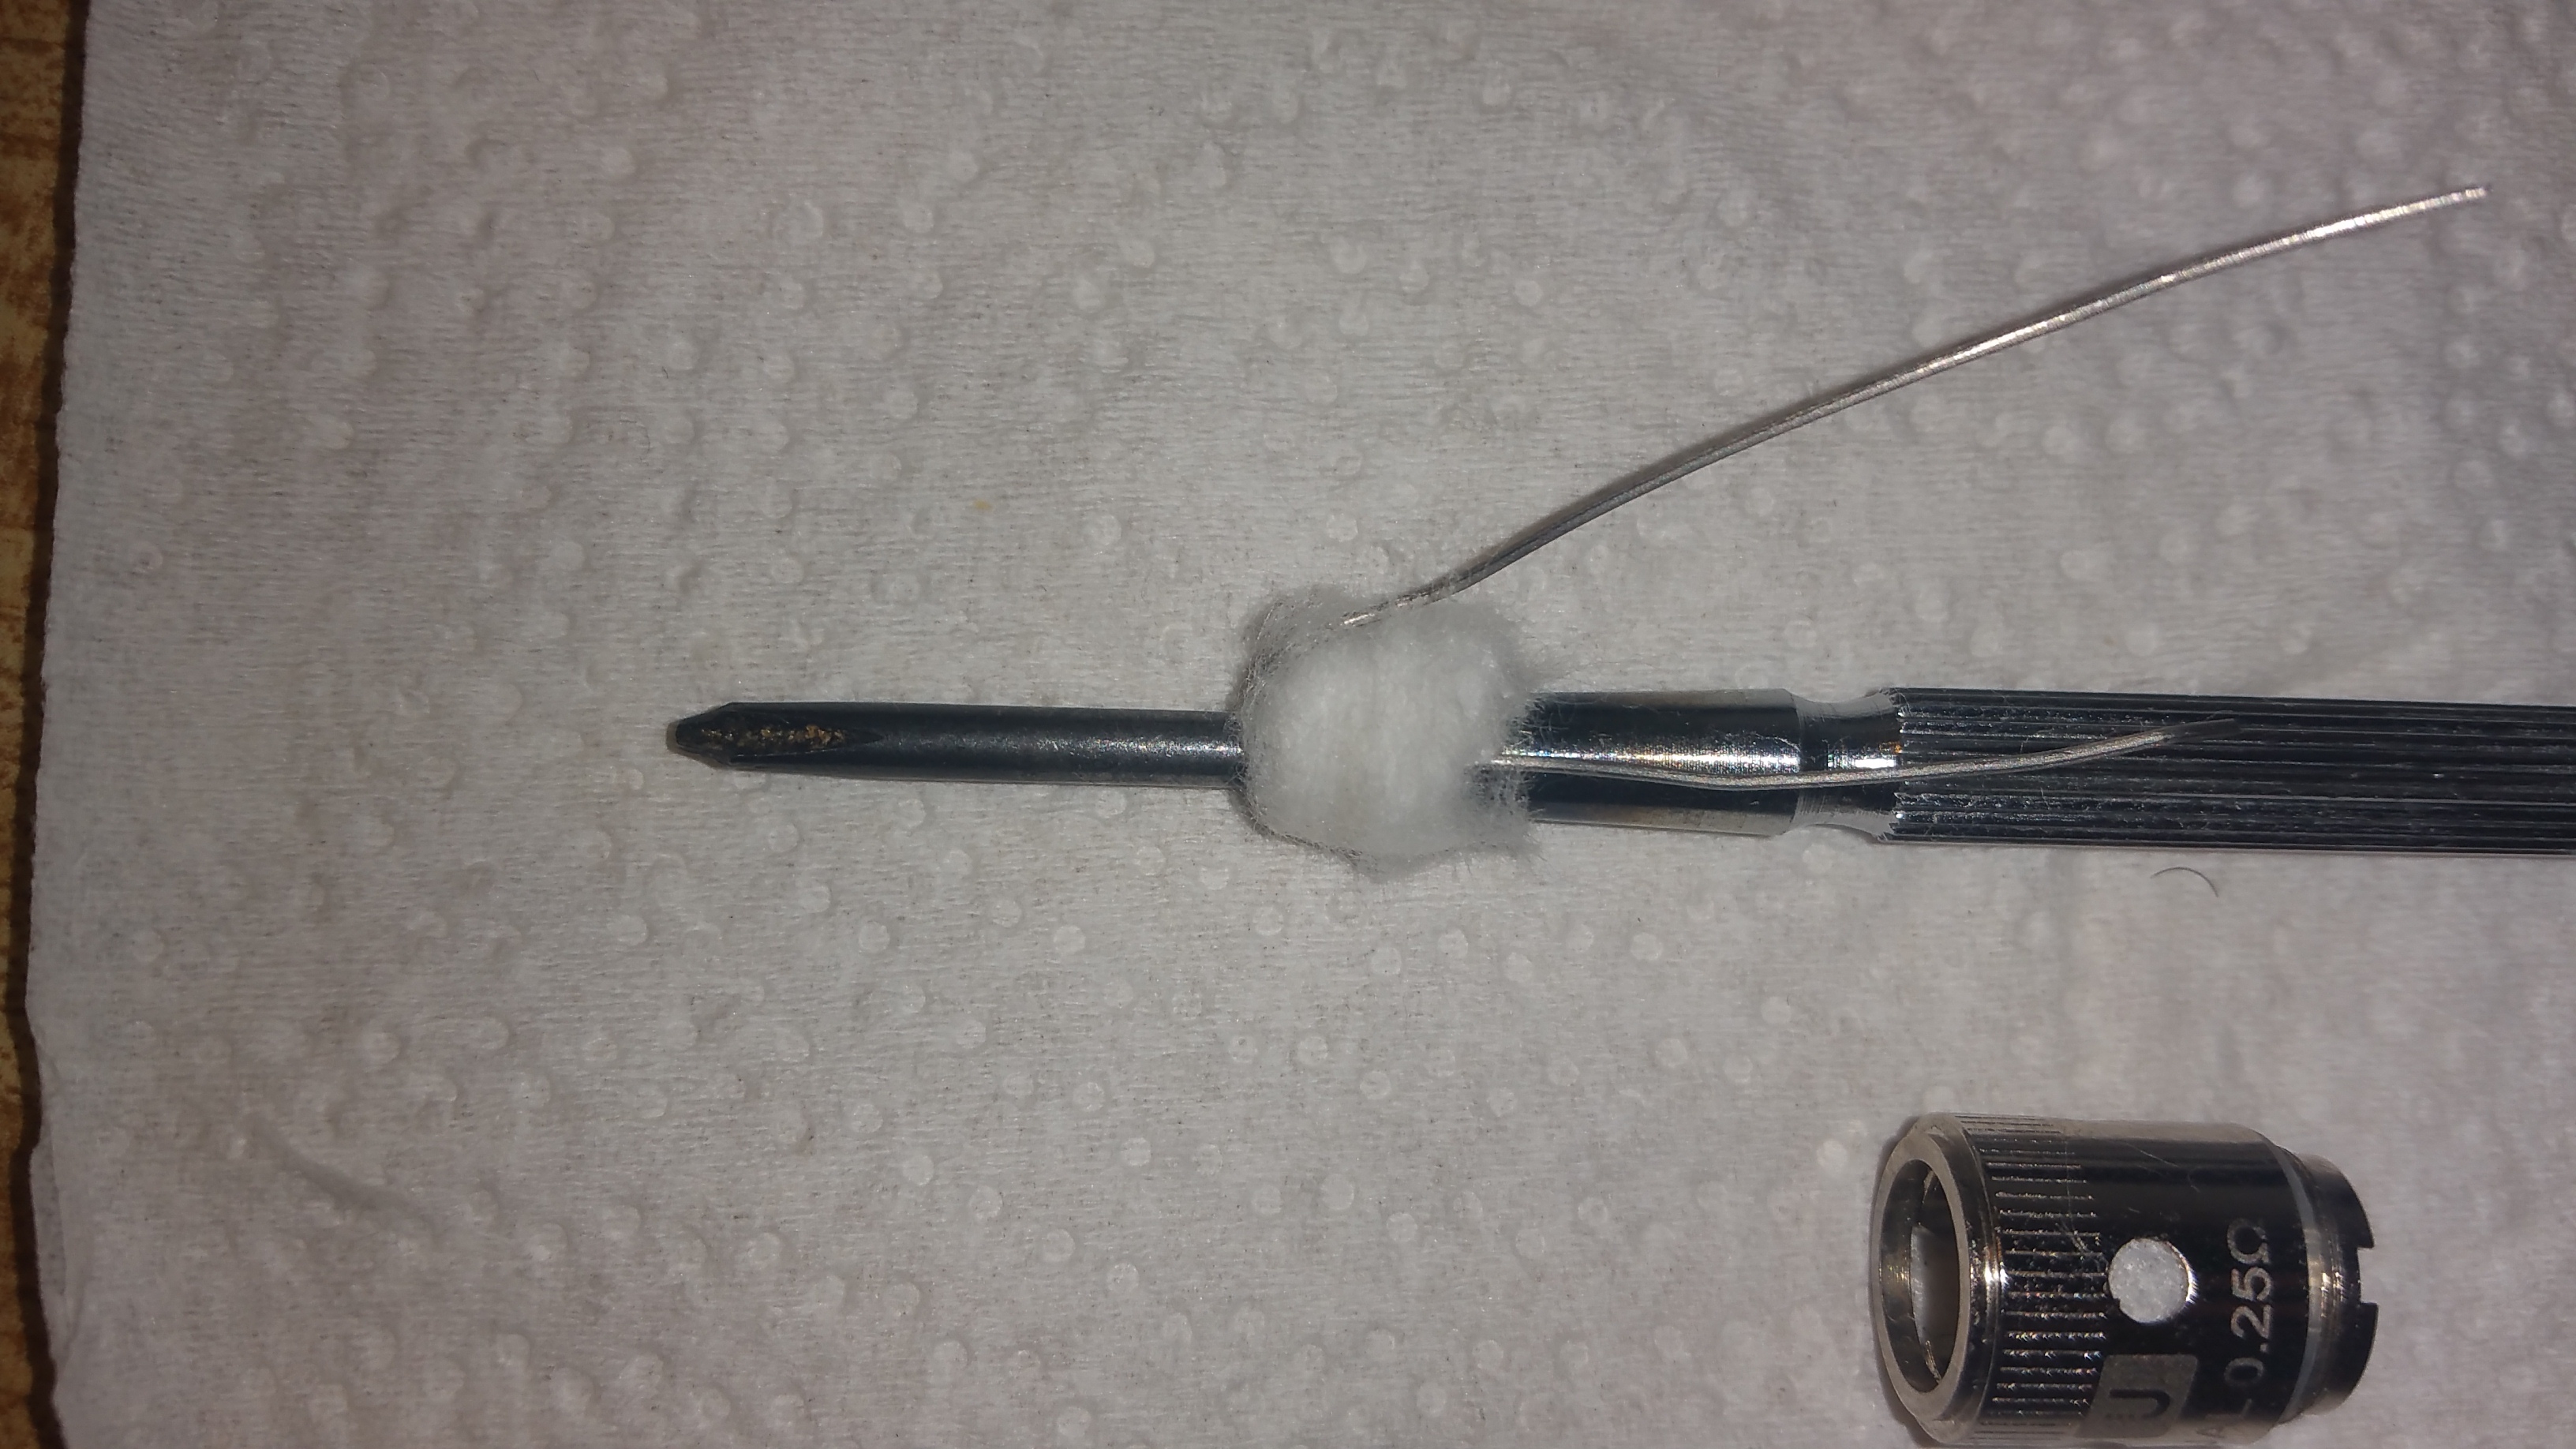
At this point I used a small screwdriver to pack and tidy up the cotton and the coil. You can also reinsert the wrapping to keep the airway open.

Pull out your wrapping tool and put your rubber insulator back in with the shorter wire inside insulator and the longer wire outside of the insulator. These are your positive negative legs.

Excuse me for not having a clean insulator. I forgot to take these photos on my first rebuild, so I ripped apart another coil to complete this tutorial

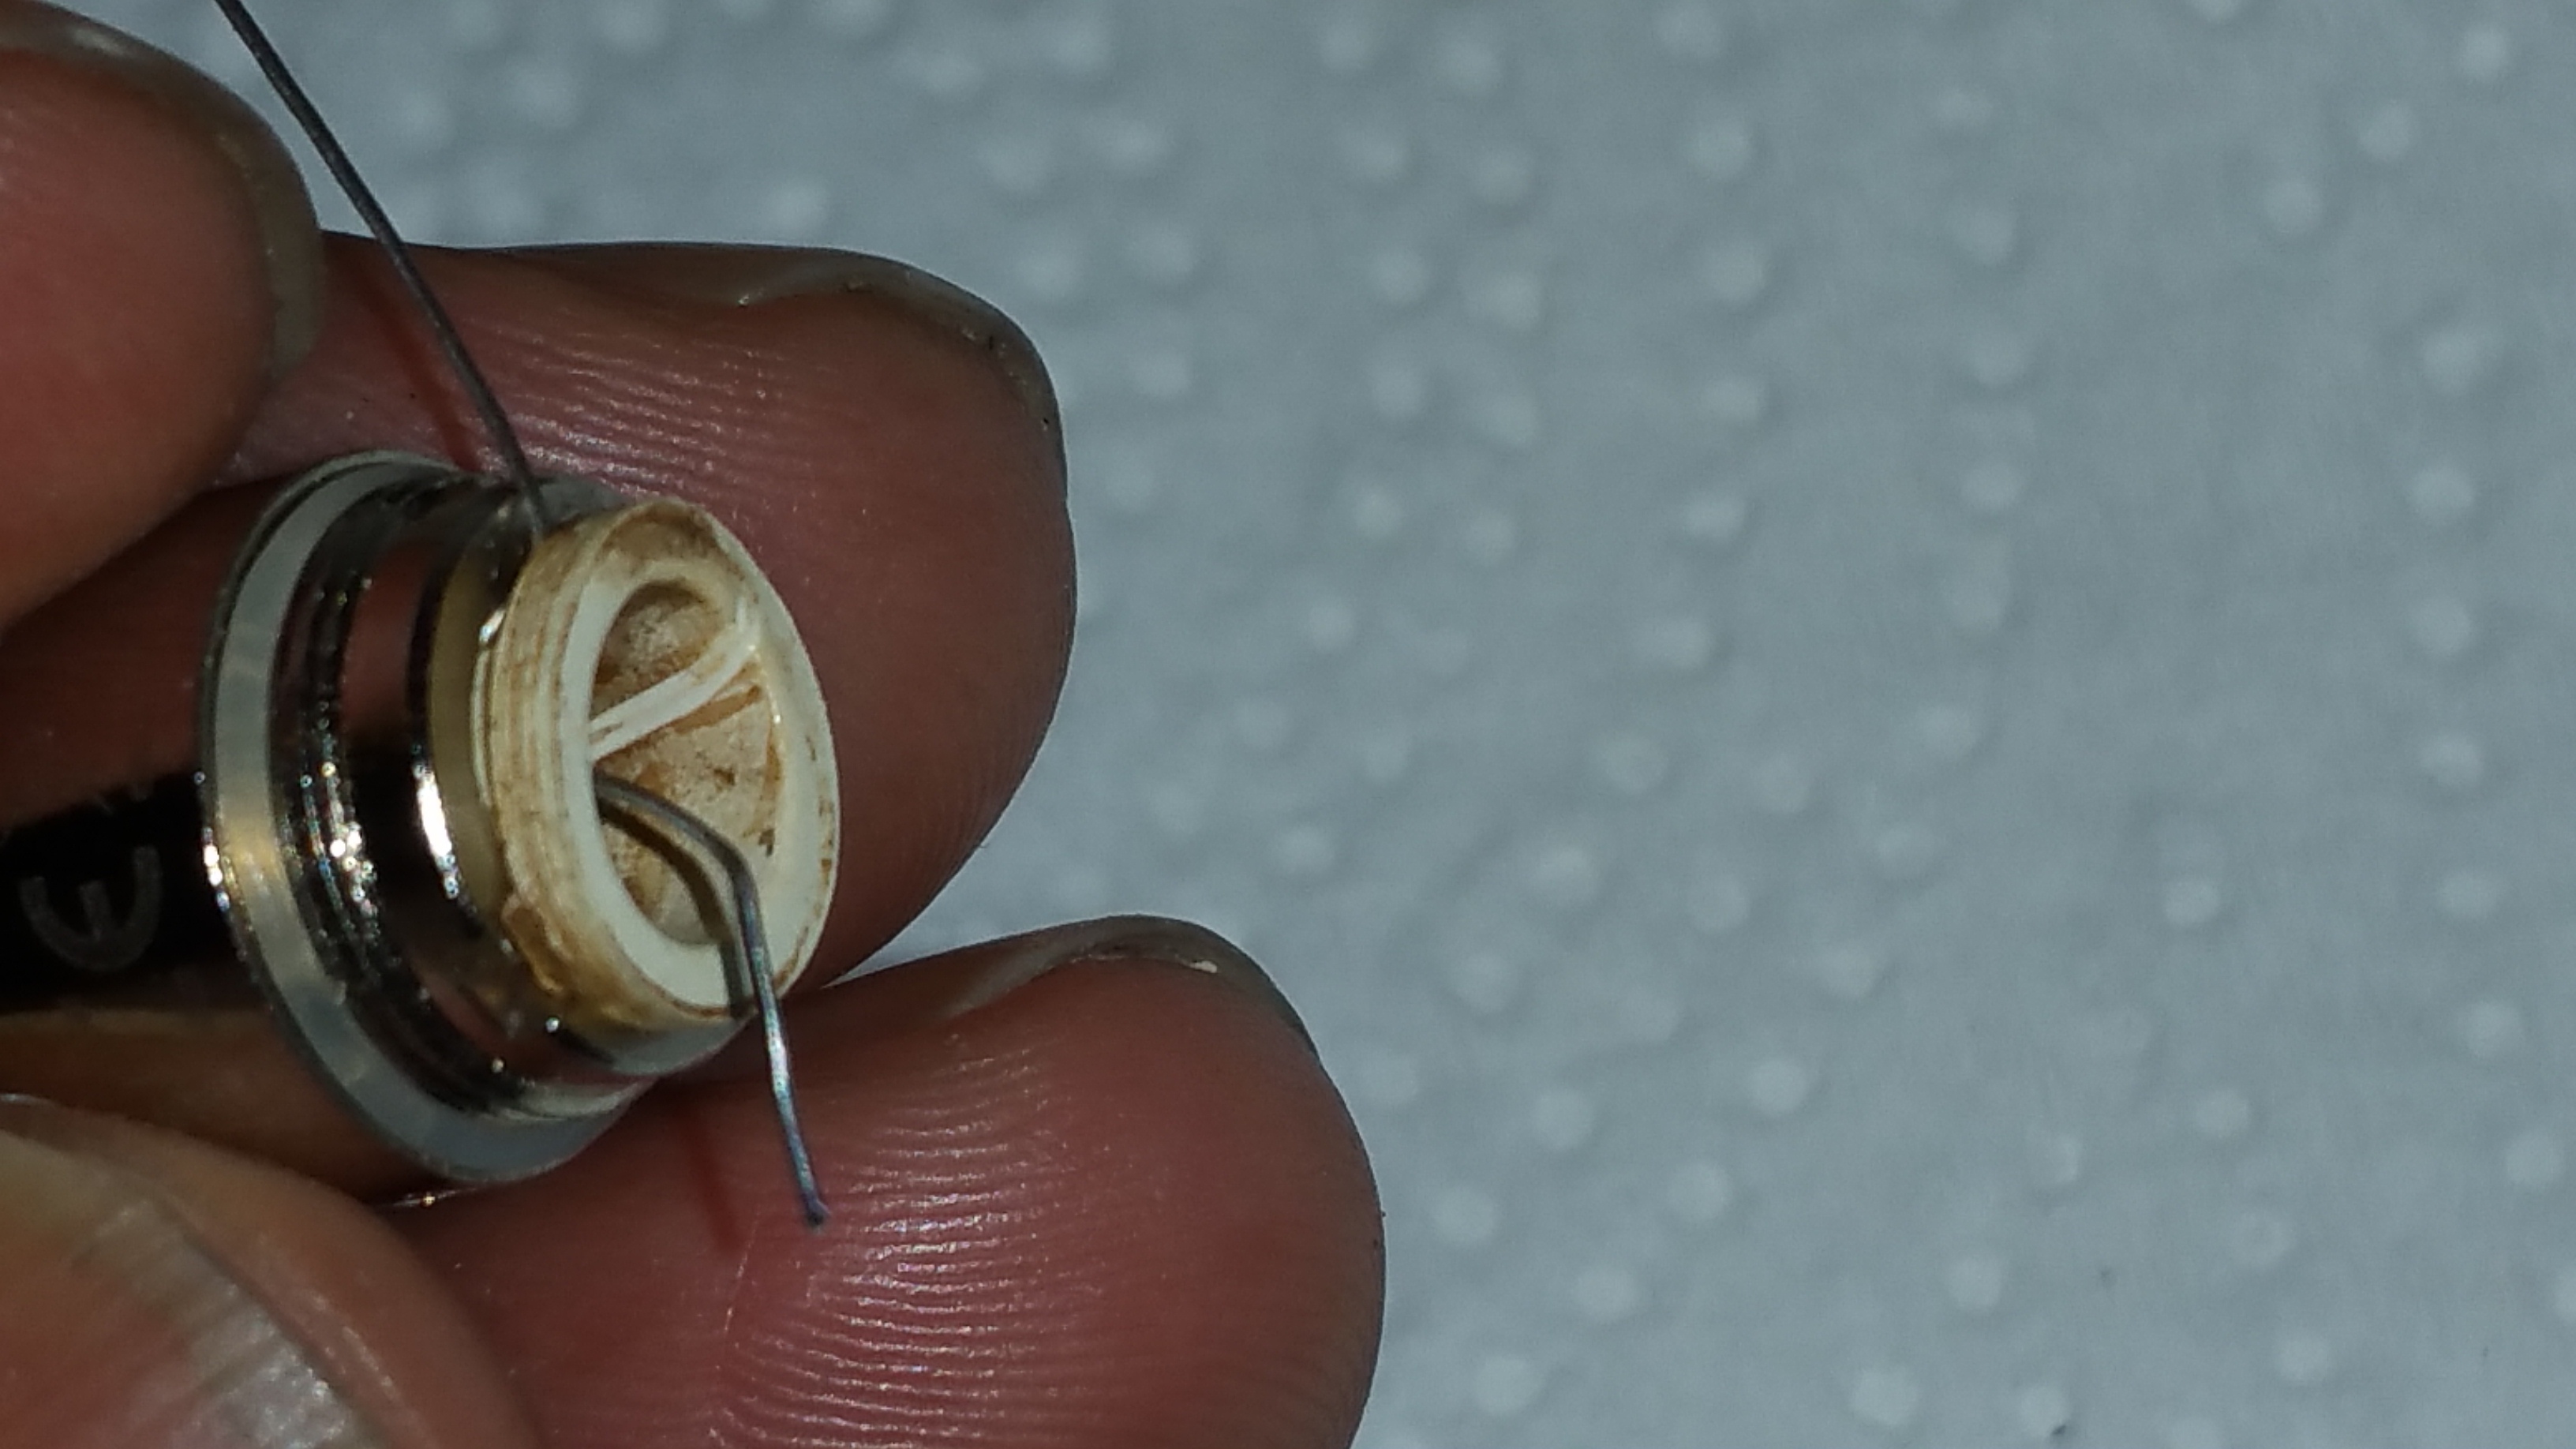
Now reinsert your metal contact pin and trim the excess wire as flush as possible. I wiggle my excess wire back and forth until it breaks flush.

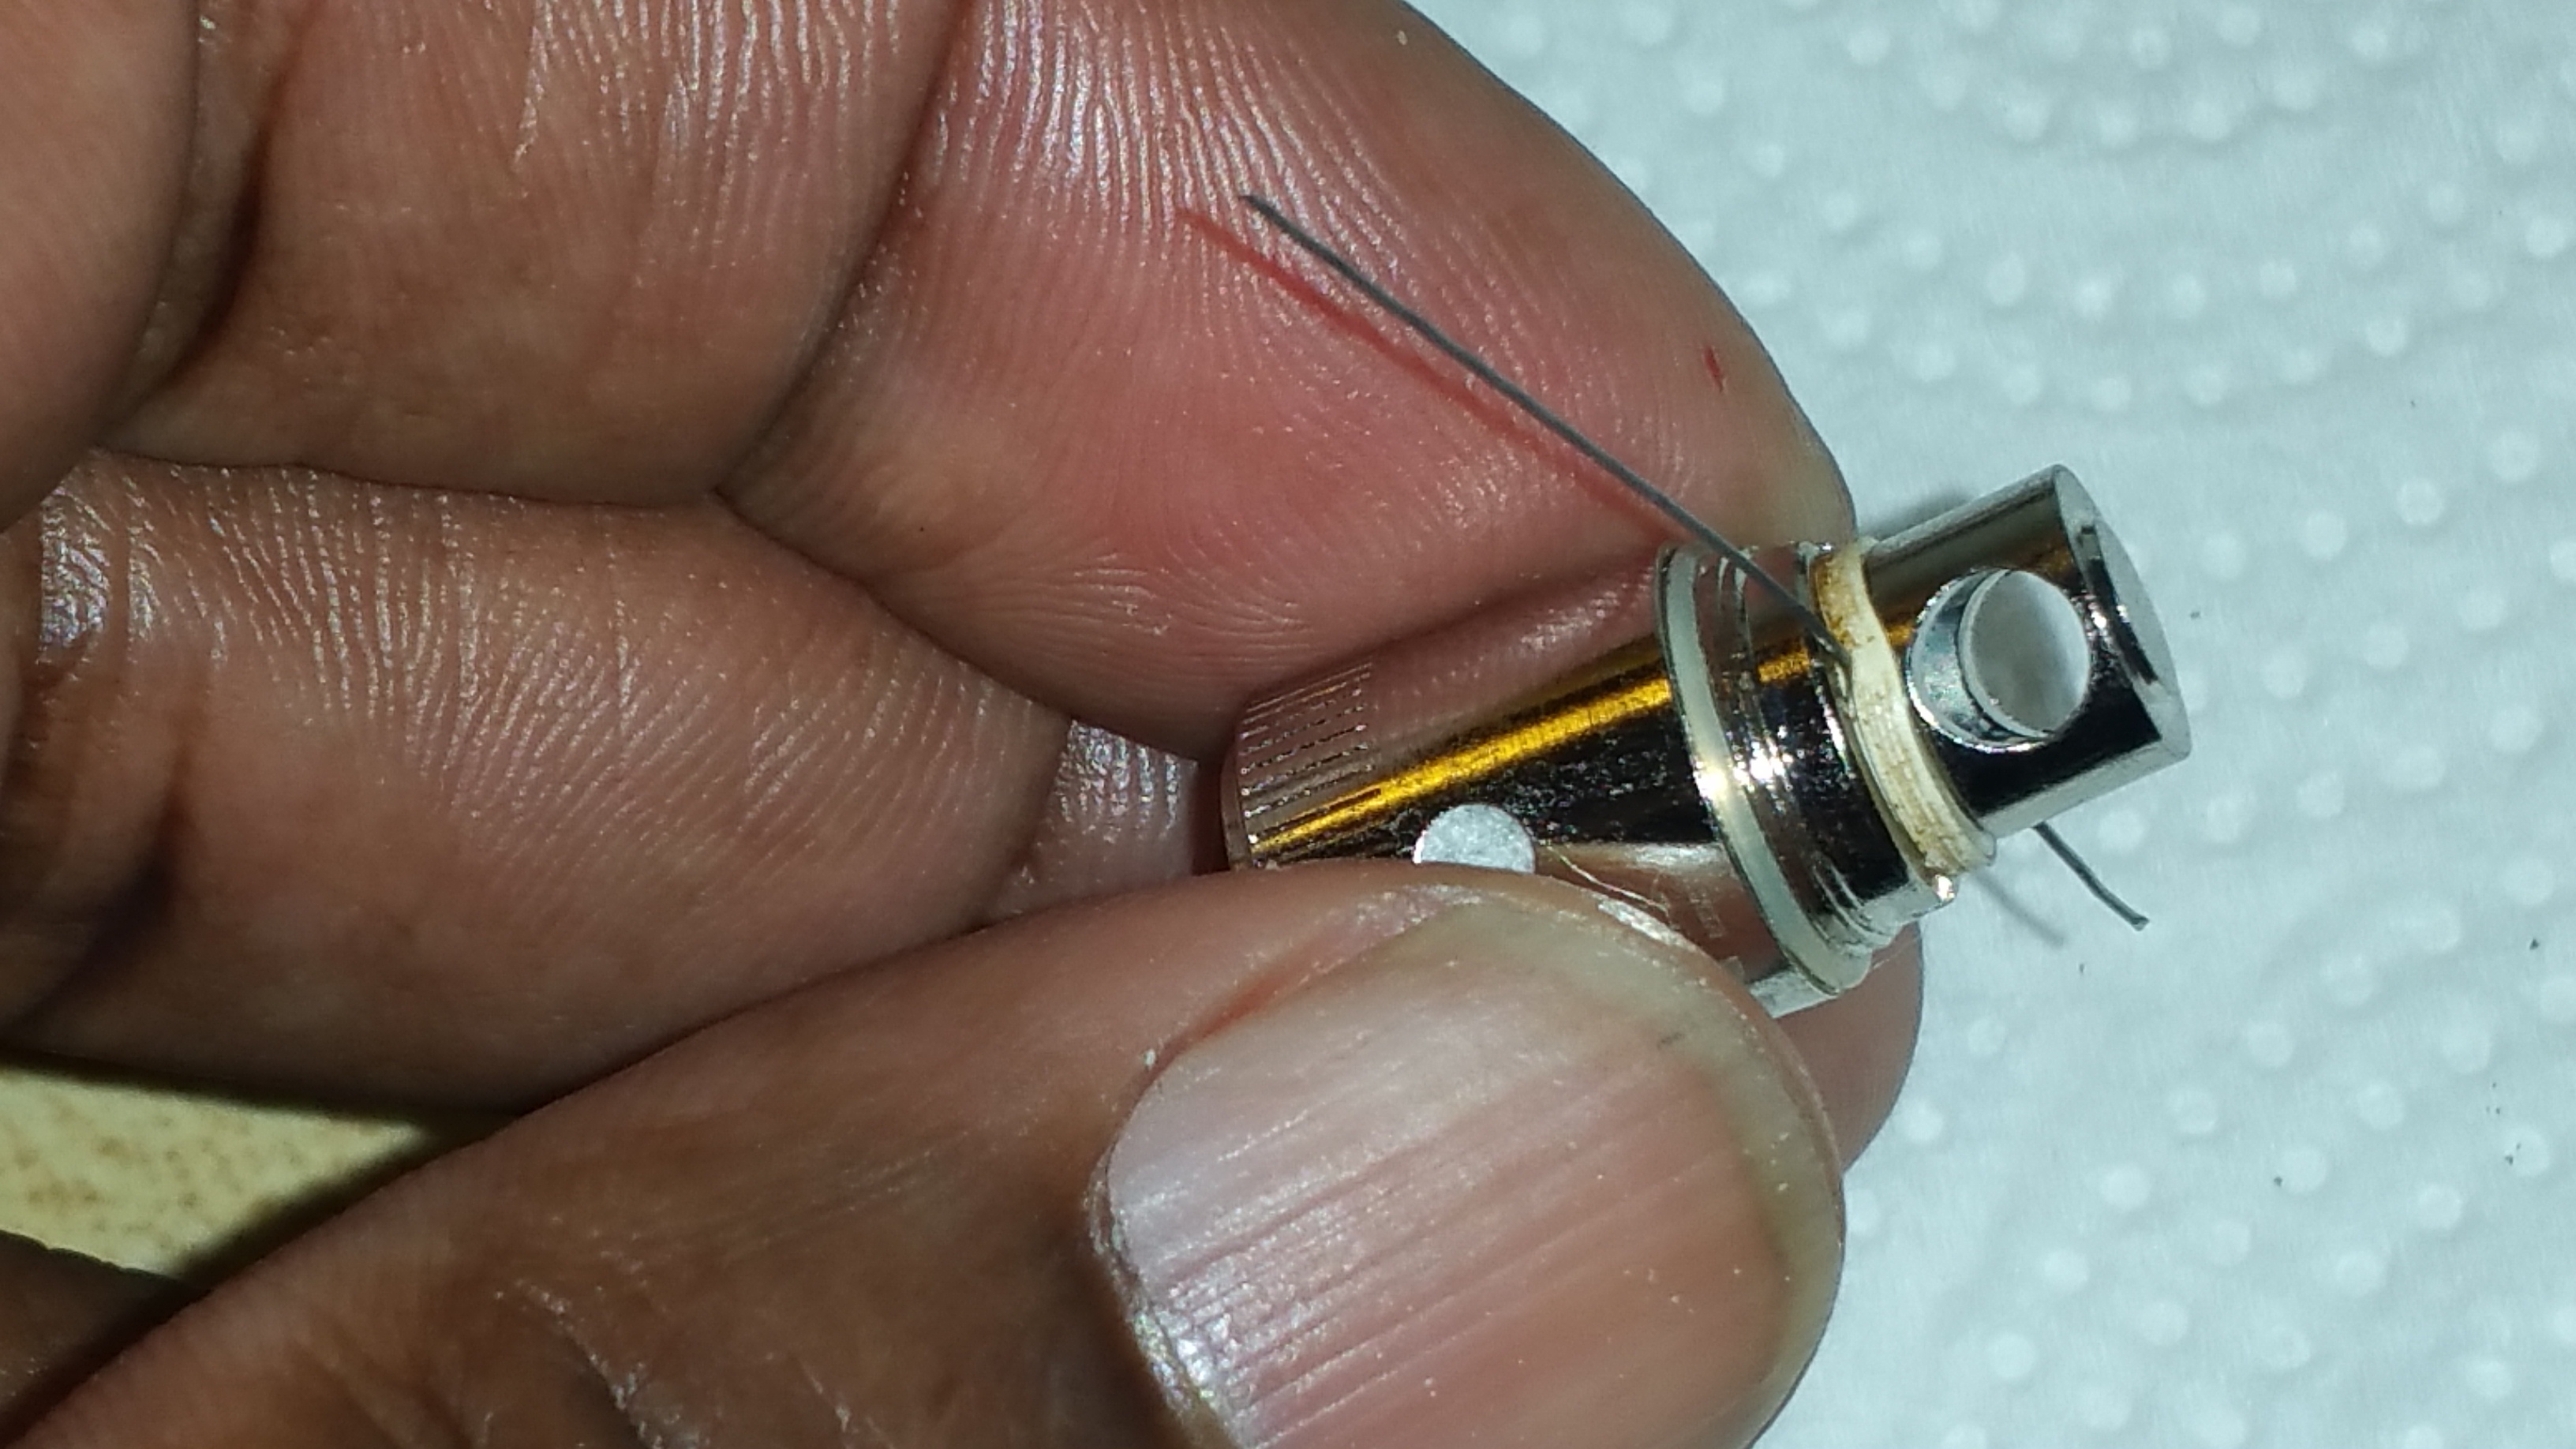
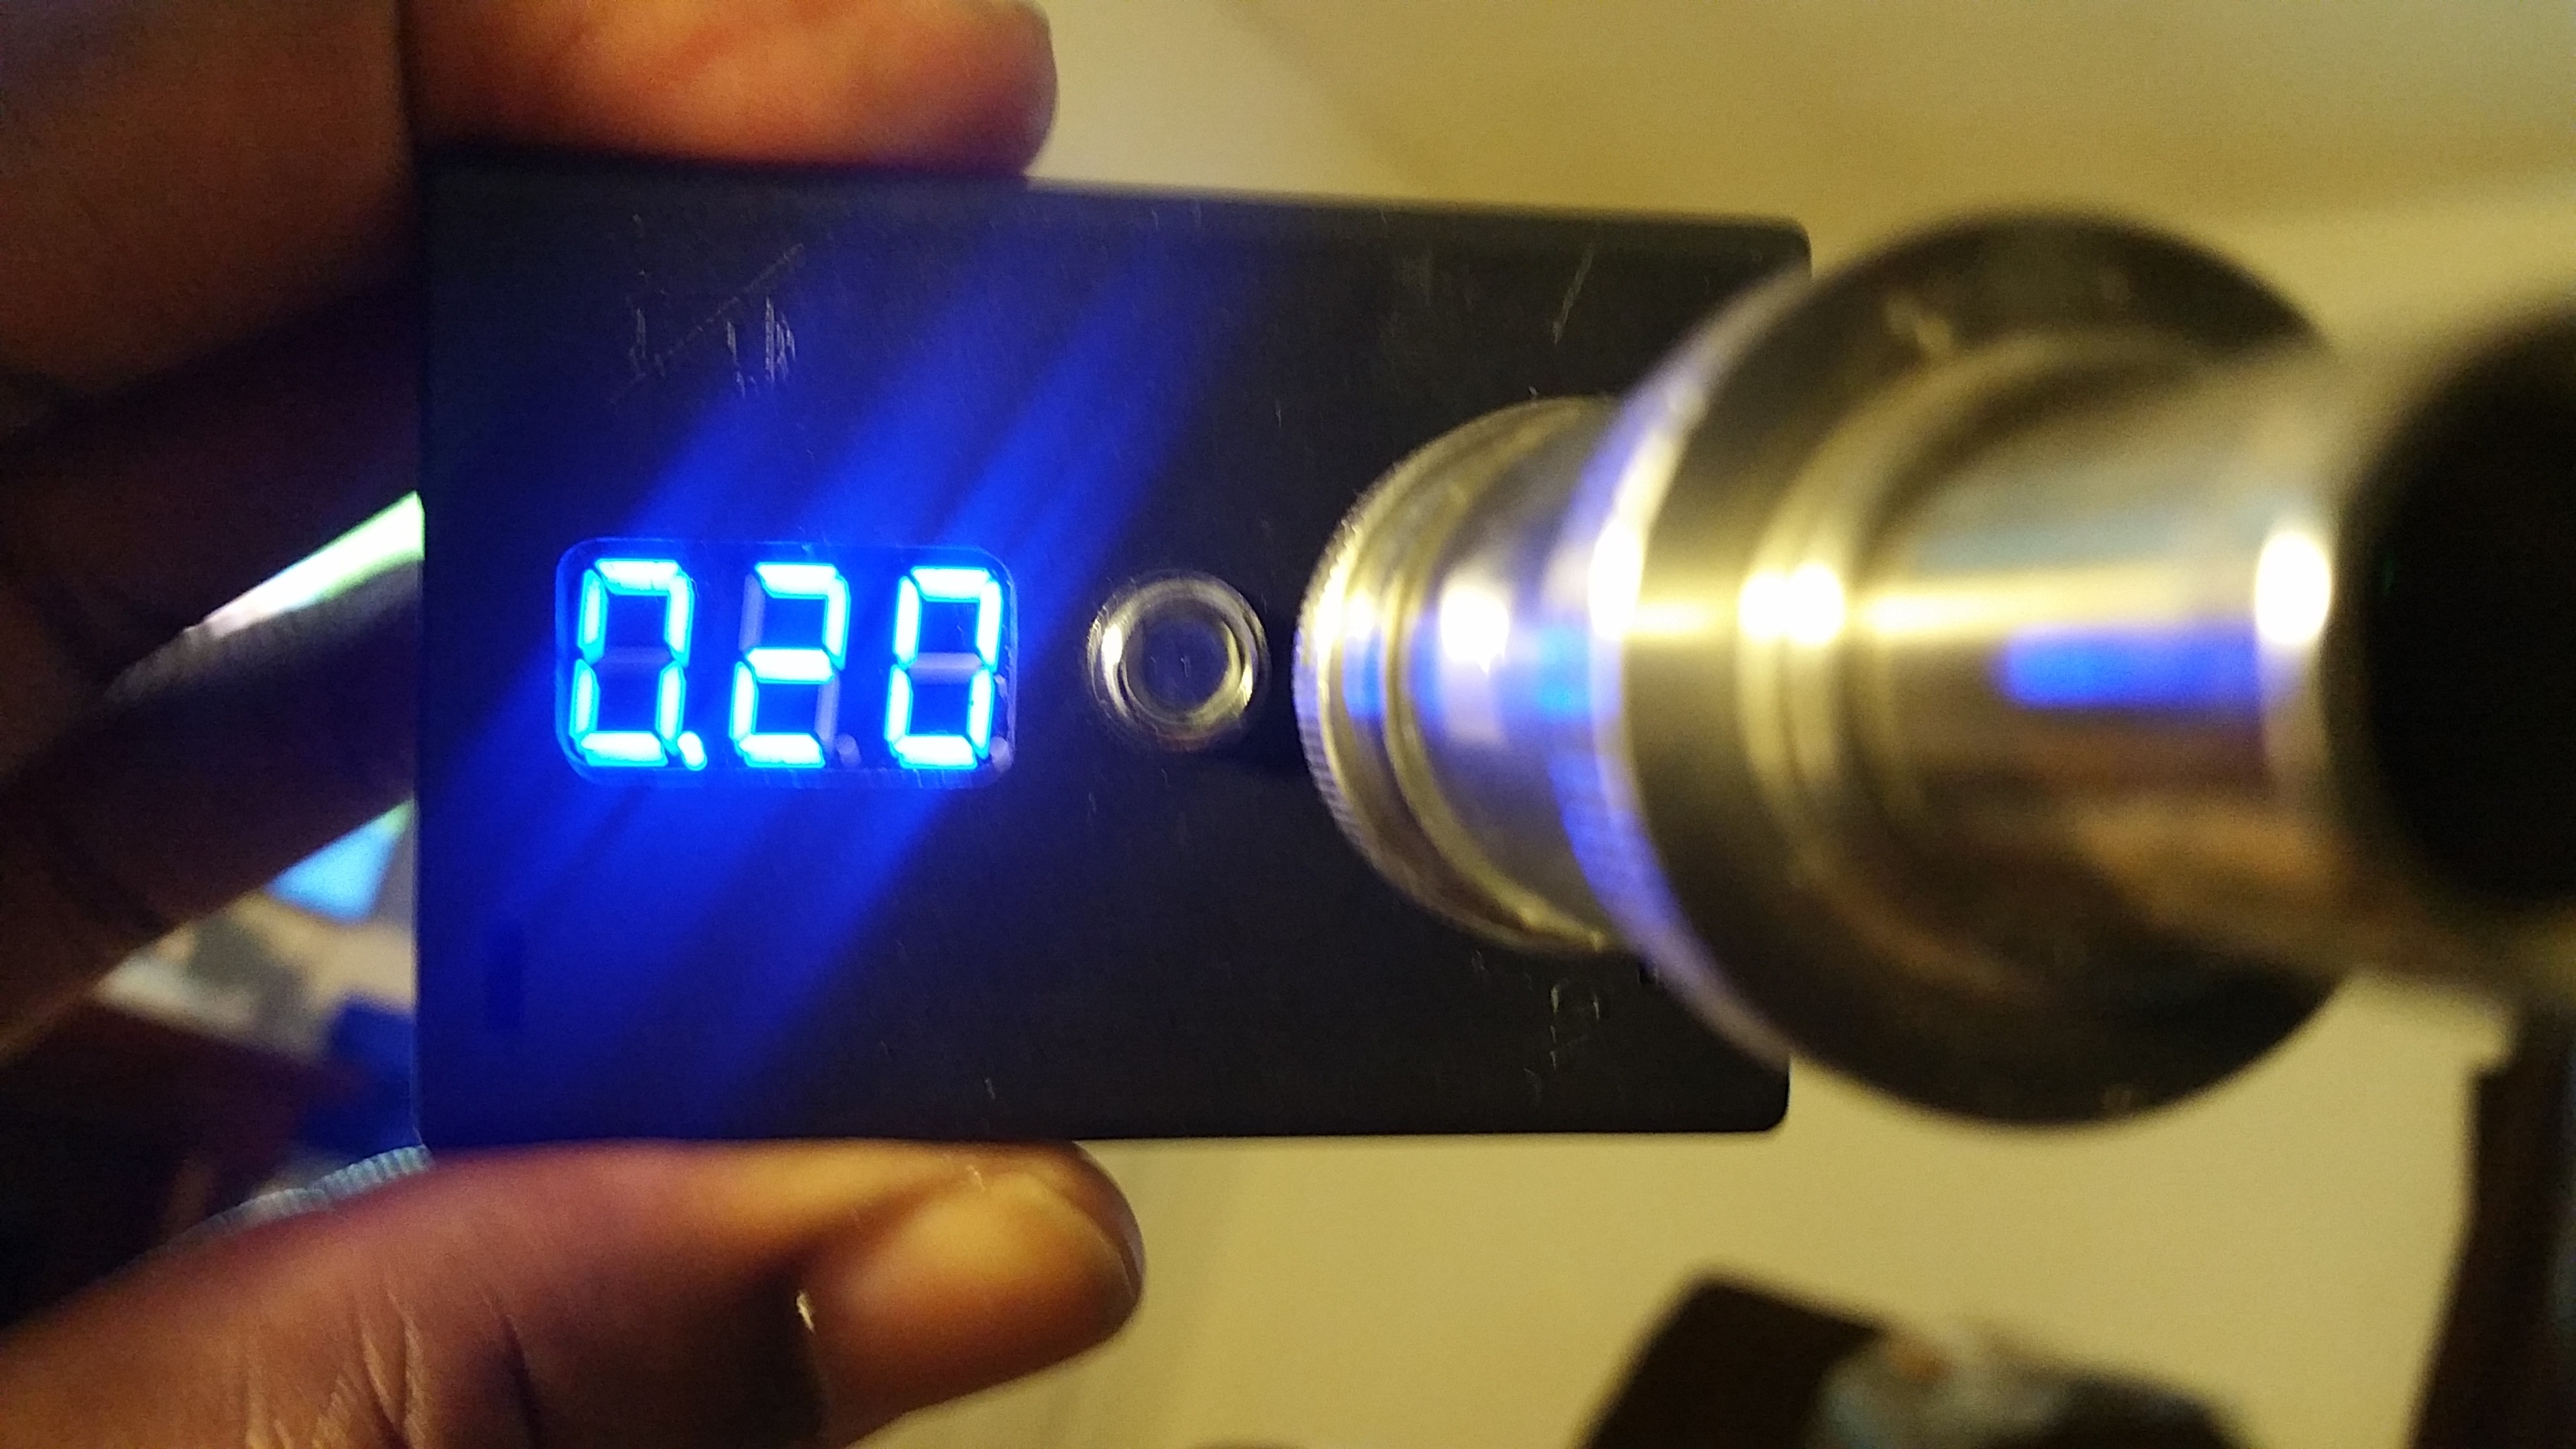
Check your resistance… if it check out ok then you’re set. Remember to saturate your coil before you fire it. You can also reinsert the wrapping tool to make sure the airway open. You should be gtg (good to go).

Don’t expect perfection on your first try. Just as with anything… it will take a little practice and your own modifications to consistently get it right… Good luck!

Please comment if you know of a way to make this easier.

7 Likes

Do you like this better than the RBA coil?

It’s close but not better IMO. I’ve only done 1 rebuild. When I get better at it, I’m going to try a dual. That should be better. I did one on a different vertical stock coil first. I just wanted to see if it could be done. It may help people that don’t have the RBA.

1 Like

Are you using stainless wire? What is the gauge of the wire you used?

1 Like

I used 22g Titanium.

1 Like

I’ve rebuilt the Atlantis coils like this but I wet the cotton with juice before wrapping it around the coil… it fits into the top piece alot easier… allows you to use a bit more cotton in turn less chance of spitty coil…

2 Likes

That’s a good idea. That’ll make it a lot easier to shape. I’ll do that on my next rebuild.

1 Like

I assume, if you build a dual coil, as long as the positive and negative legs are on the same ends of the coil and placed correctly (inside and outside the insulator) you won’t get a shot if the coils touch each other, is that true? It would seem to require a very precise build if it did.

Thanks for this post!

1 Like

Cool build, P.V.
The cotton used in these from the factory is oddly different than we use to rebuild.
Any ideas what it could be?

2 Likes

They say its organic.

2 Likes

Nice tutorial. This is the same way I used to make the Nautilus coils only on a much smaller scale. I learned that these coils could be rebuilt and that buying the replacement ready-mades is far less frustrating. Sometimes you have to climb the mountain, just cuz it’s there. :grinning:

3 Likes

That’s an awesome idea, I’m going to have to try it myself! Have you tried a parallel build in it yet?

Not yet. I’m still try to perfect the single coil first.

1 Like

Now why couldn’t they make the RBA deck similar to this? Lol, I have the RBA and I’m not impressed with single horizontal coils, I’m going to be using this method and trying a parallel… Will post pics soon

2 Likes

Thanks for posting this. I bookmarked it so if I ever get around to ordering the Crown I can try this. I’ve never built a vertical coil…should be interesting. :slight_smile:

3 Likes

I see you in the bushes! Marco! :stuck_out_tongue_winking_eye:

Good to see you! Hope things have been going great…

I haven’t gotten a crown either, but @DarthVaper has just about talked me into it! I’ll be doing a rebuildable RBA deck when I get mine (separate purchase from the atomizer…booooo!). I’ll keep an eye out for an authentic and if I see something priced low, I’ll let you know about it… Same on your end? Okie dokie? :+1:

2 Likes

@Jimk was that link I post good for the $20 one??

1 Like

ft has a decent looking clone ( if the pics are real? ) about $14??

1 Like

I’ve seen it. I may give it a shot. I don’t really mind being the guinea pig on that one. Any clue if it takes authentic coils?

1 Like

Polo!! Hehe. Things are well, thanks!

I’ll keep my eyes peeled when I start to look for real. Fasttech has it for 24, 3fvape for 22. FT doesn’t have the RBA and 3fvape is sold out. In fact, the RBA is sold out at most places. eciggity has it for 8.99 with code reddit10.

2 Likes