I would post pictures of the progress but my desk is so messy that people would make memes out of the pictures.
1 Like
Can always send privately…I would never judge, as my work area is usually 2-4 projects going all at once, lol
1 Like
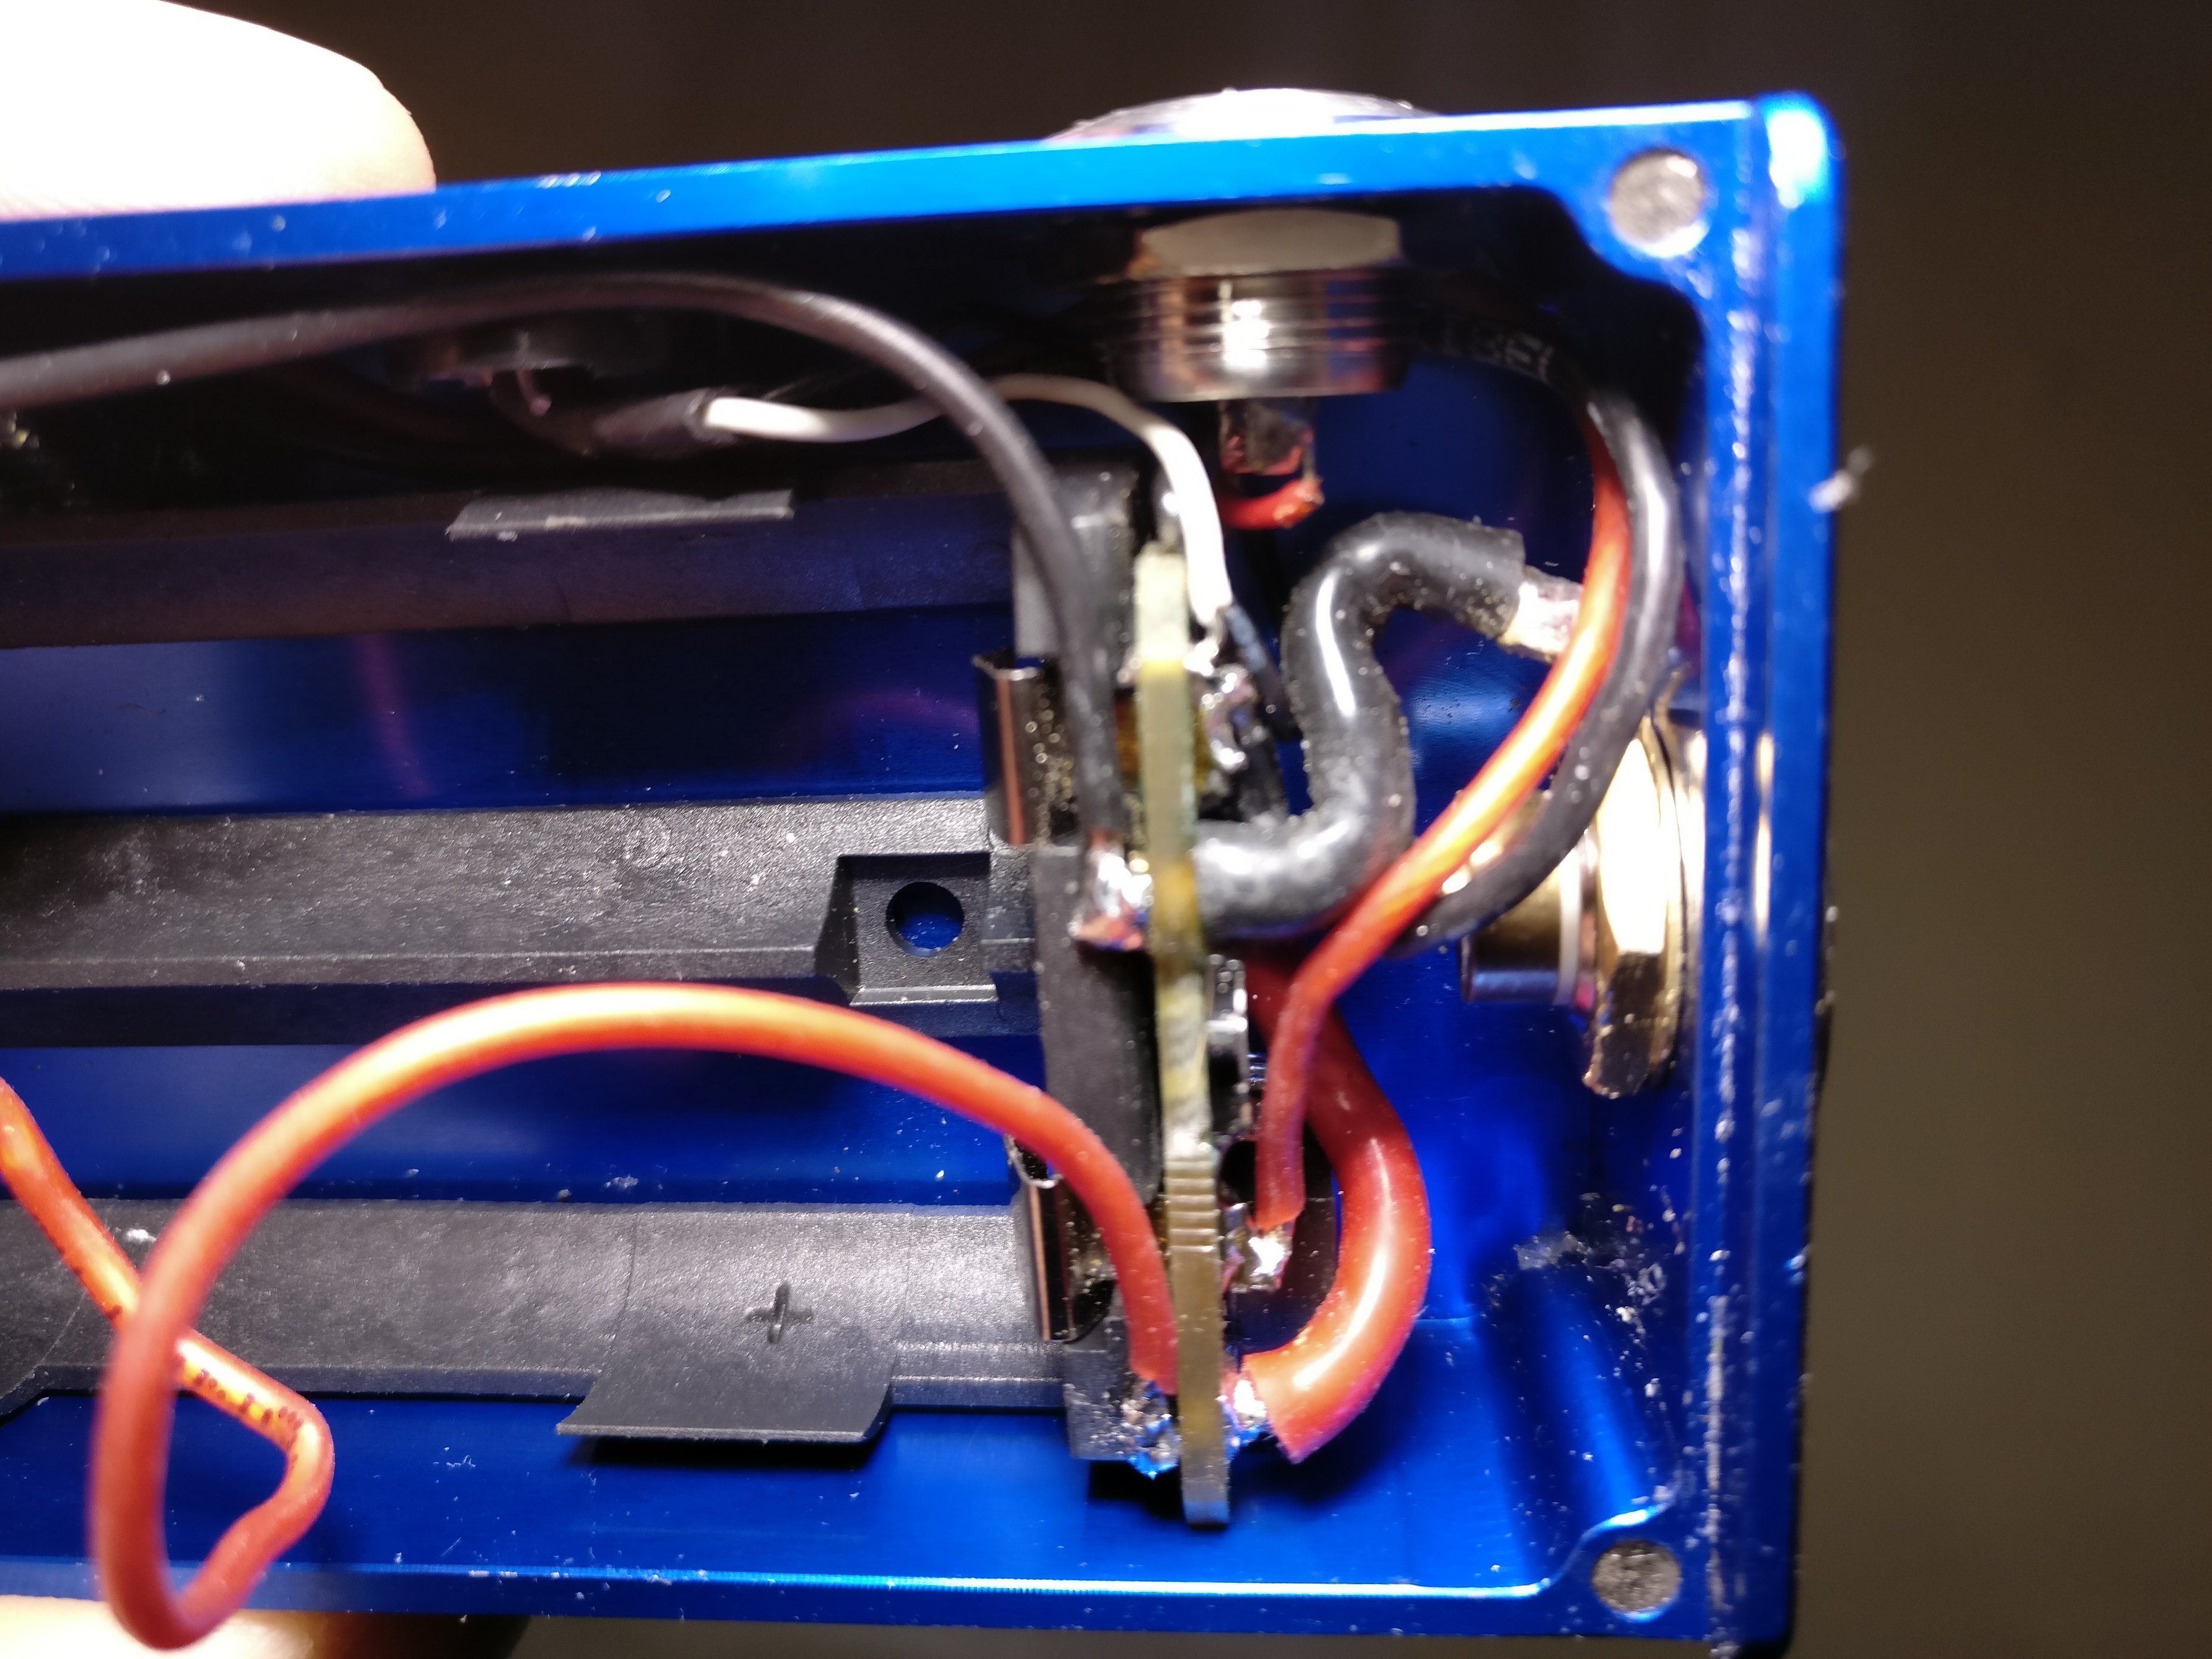
So you can thank your buddies from the fb group, that was definitely pin1. Dry run successful, get a reading on the volt meter and the switches are working, too.
3 Likes
Don’t forget to join the group moxbods!
The guy who helped has personally asked you to join the group! Wants to see the build too!

1 Like
Right… Finished the 2nd PWM mod today. The first one was a bit of a mess, holes drilled in the wrong place, window for display cut too big etc… It is working well however and I’m using it every day at the moment.
The parts are:
Big Al’s 4S sled mount board
Mod meter
standard pot and 12mm flush switch
Fat Daddy’s V4 510 connector
I’ve used the mod meter to have a bit more info. It shows watts, bat voltage, output voltage, current and coil resistance. Unfortunately it doesn’t seem to show correct values. Values are changing when fired. I expected problems measuring the output voltage because of the PWM.
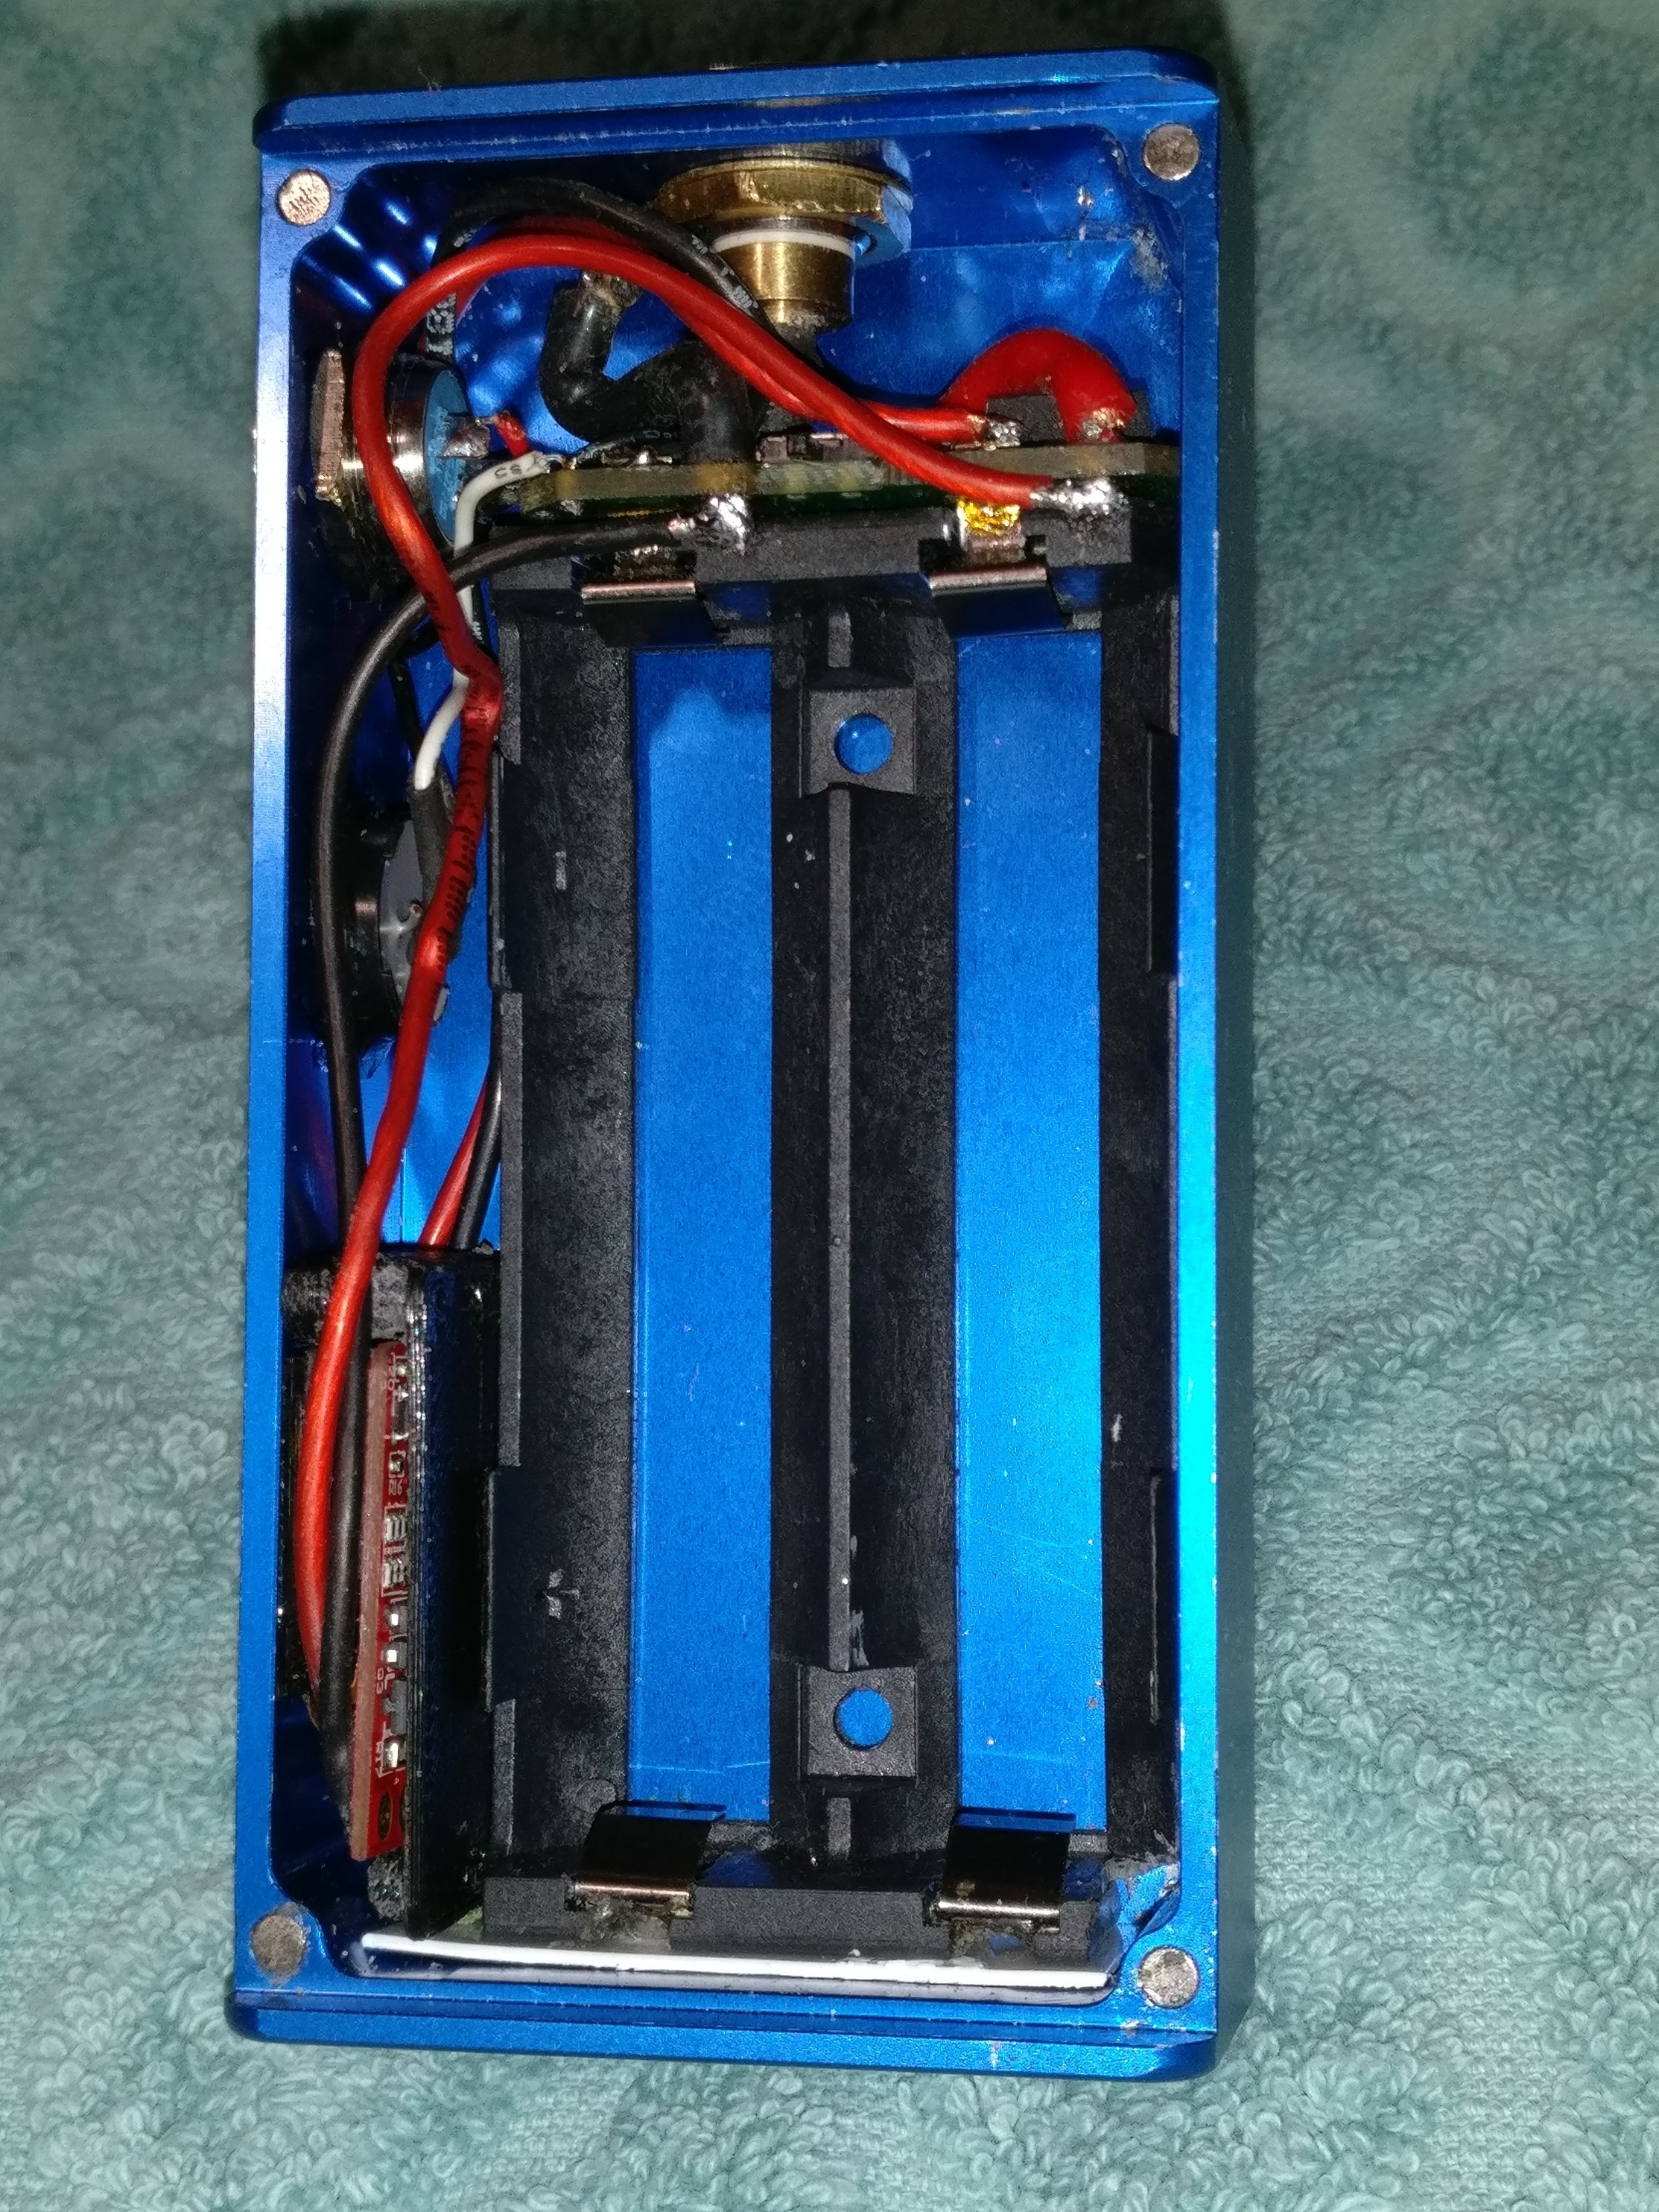
It is a well working mod but it is definitely a prototype kinda thingy. The box is messed up pretty bad, a few scratches, holes in the wrong spot. One of the magnets got in the wrong way so i had to push it in further and put another one on top. Of course the lid won’t close completely now. I will probably take that mod meter out again (or better take the sled, board, 510, pot and switch into a nicer box) so I haven’t tried to hide the wires/mess on the inside. It’s the 2nd blue mod on the pic. The black ones are a Cuboid and a Cuboid mini to compare the size.

Here’s the inside. What can i say, electrically sound but ugly.
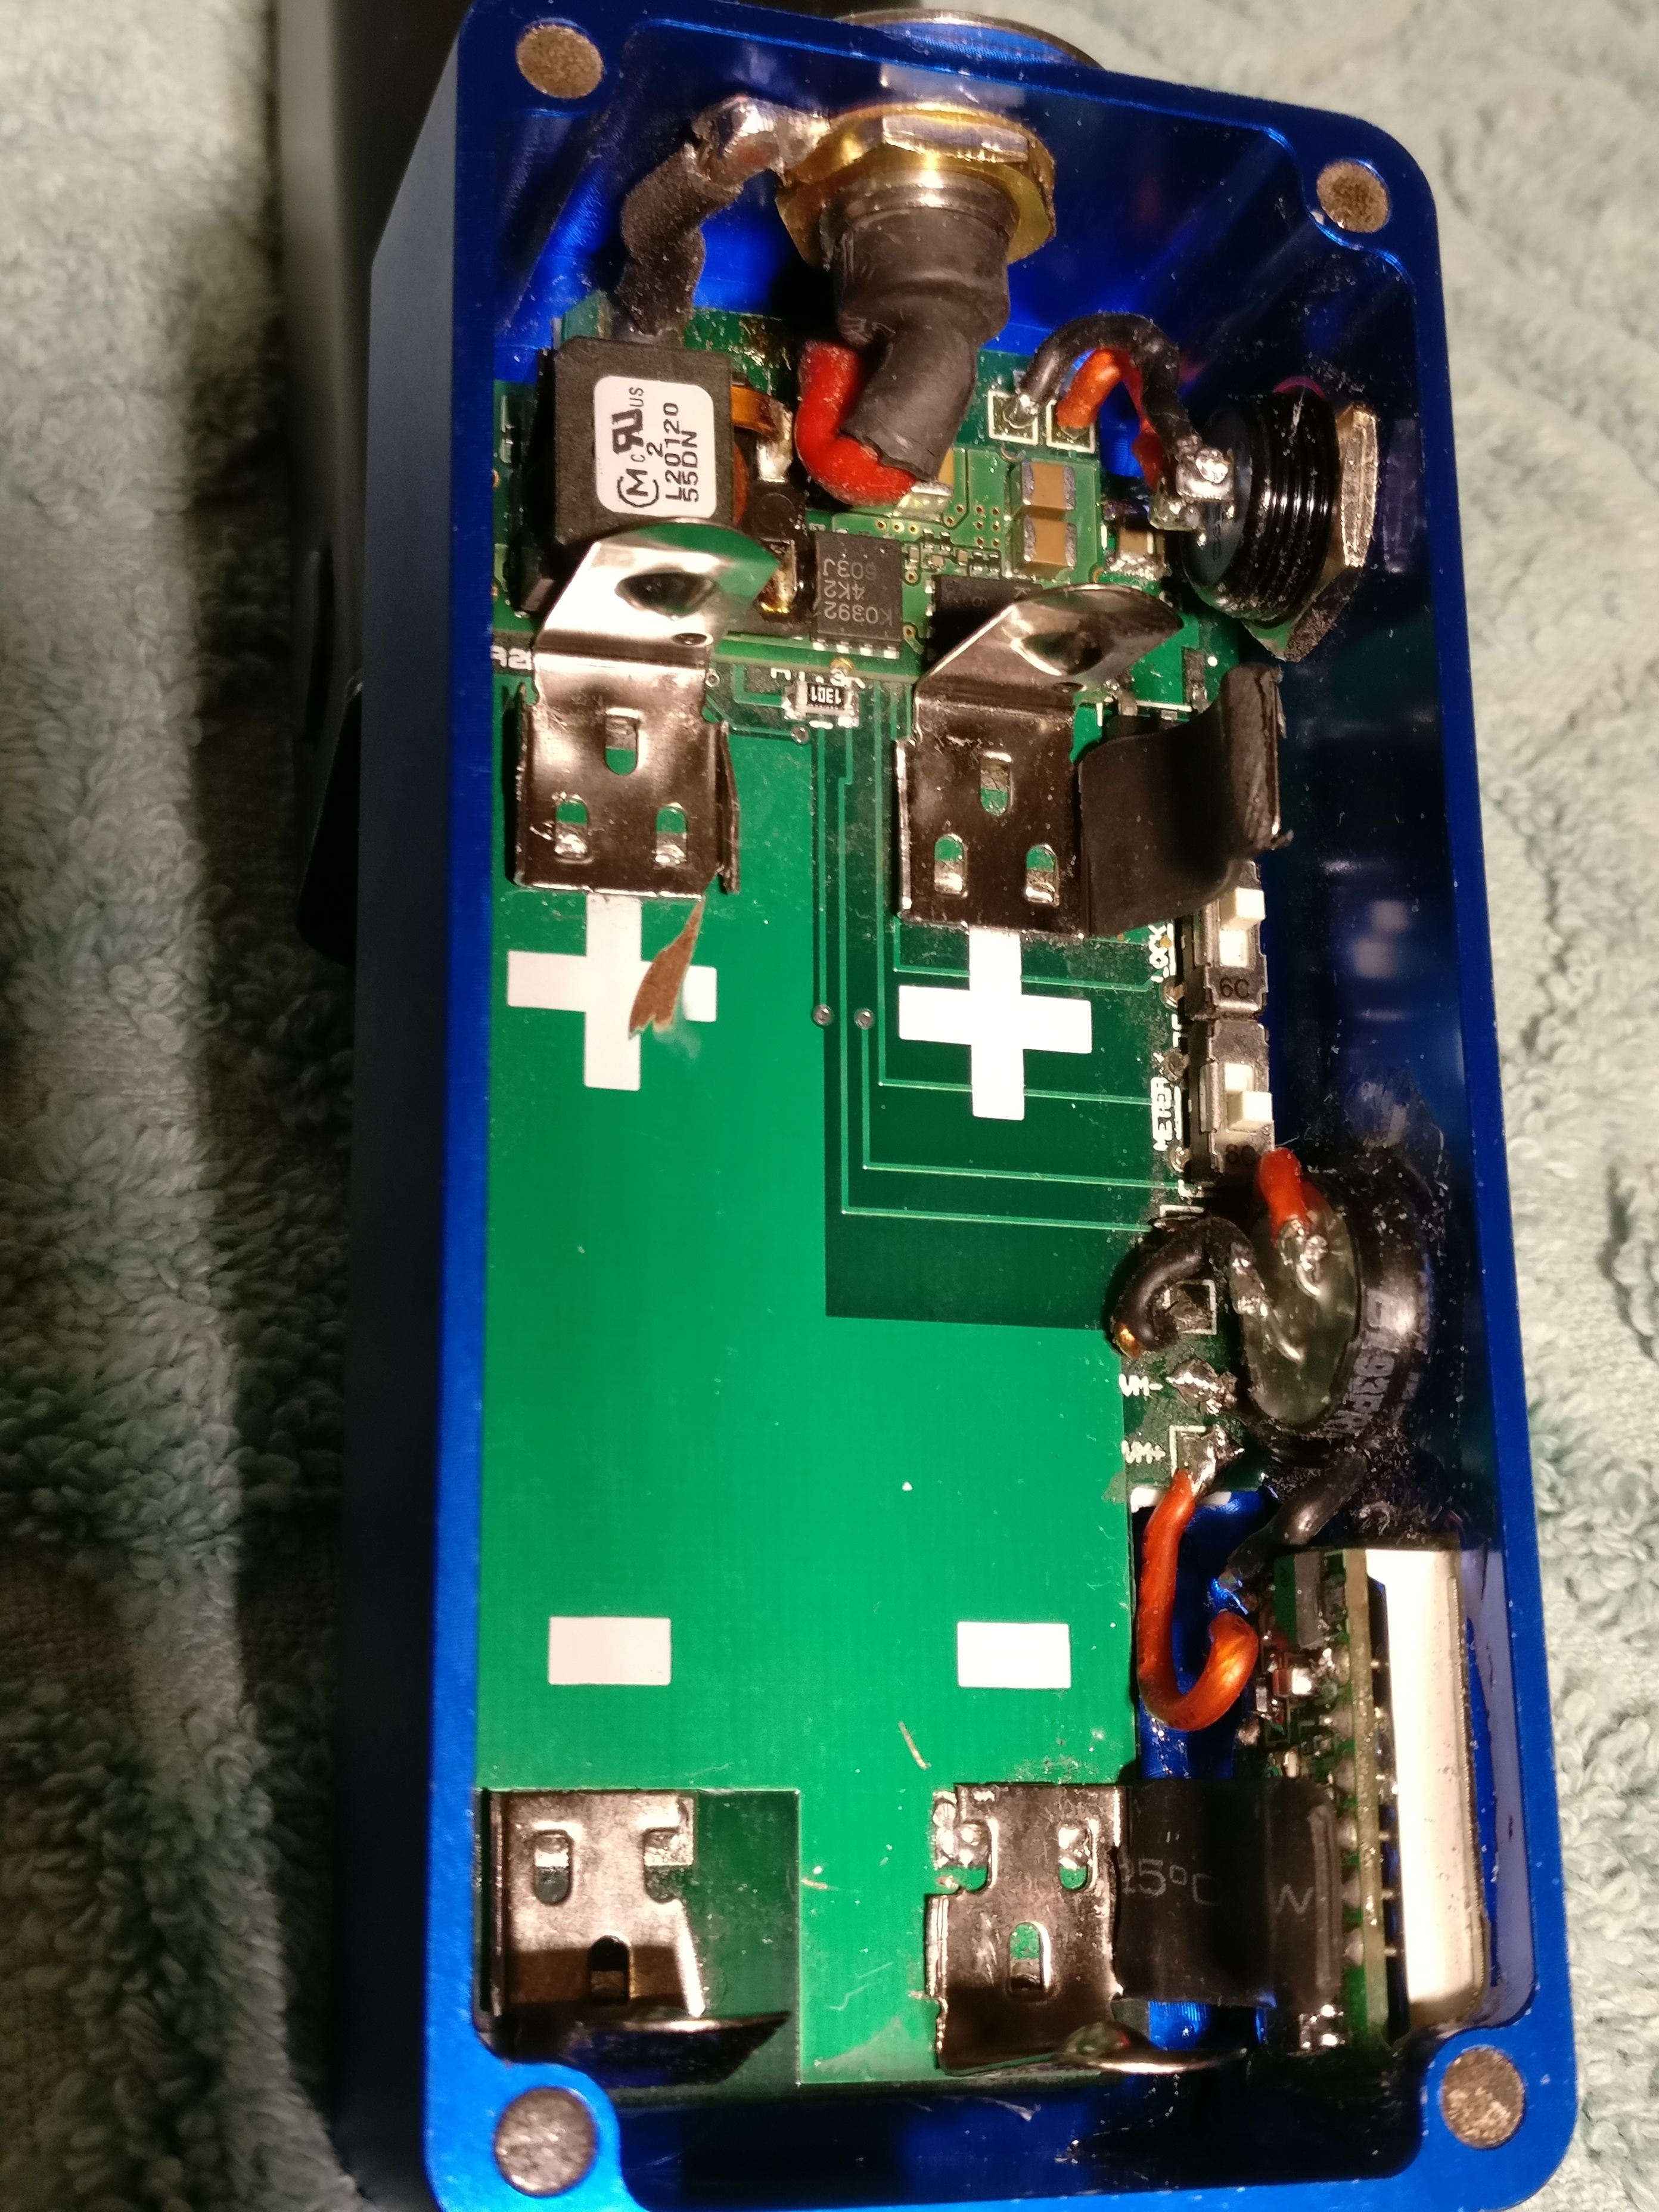
Today I’ve finished the 2nd PWM mod. It is the first one of the 4 on the picture. Different parts, it is a Murata OKL2-T/20 module on a base board for easier wiring. Should be good for around 100W Relatively easy to build, a few smd components and battery clips on board instead of a battery sled.
Unfortunately the enclosure is just a little bit too small so i had to trim the sides of the battery clips off to fit he batteries. With the clips i can only fit one battery. I consider this experiment failed because to make this board fit properly you have to use a bigger enclosure. But in a bigger enclosure it wastes space because without the board and just the OKL2 you could then fit a 3S battery sled.
I will still keep it for a while before i use the enclosure for something else. It vapes well but has a few imperfections. I’ve epoxied the wrong color display into the box. It’s a red one which i got mixed up with the blue one. Not a problem, just a bit annoying.
Next problem is that I must have used a wrong pin on the pot. Power is inverted, full at 0% and none at 100%. Also the hole for the pot wasn’t quite perfect so the pot has a little gap.
The box is good, it closes perfectly and i was able to hide the scratch i made under the bezel.
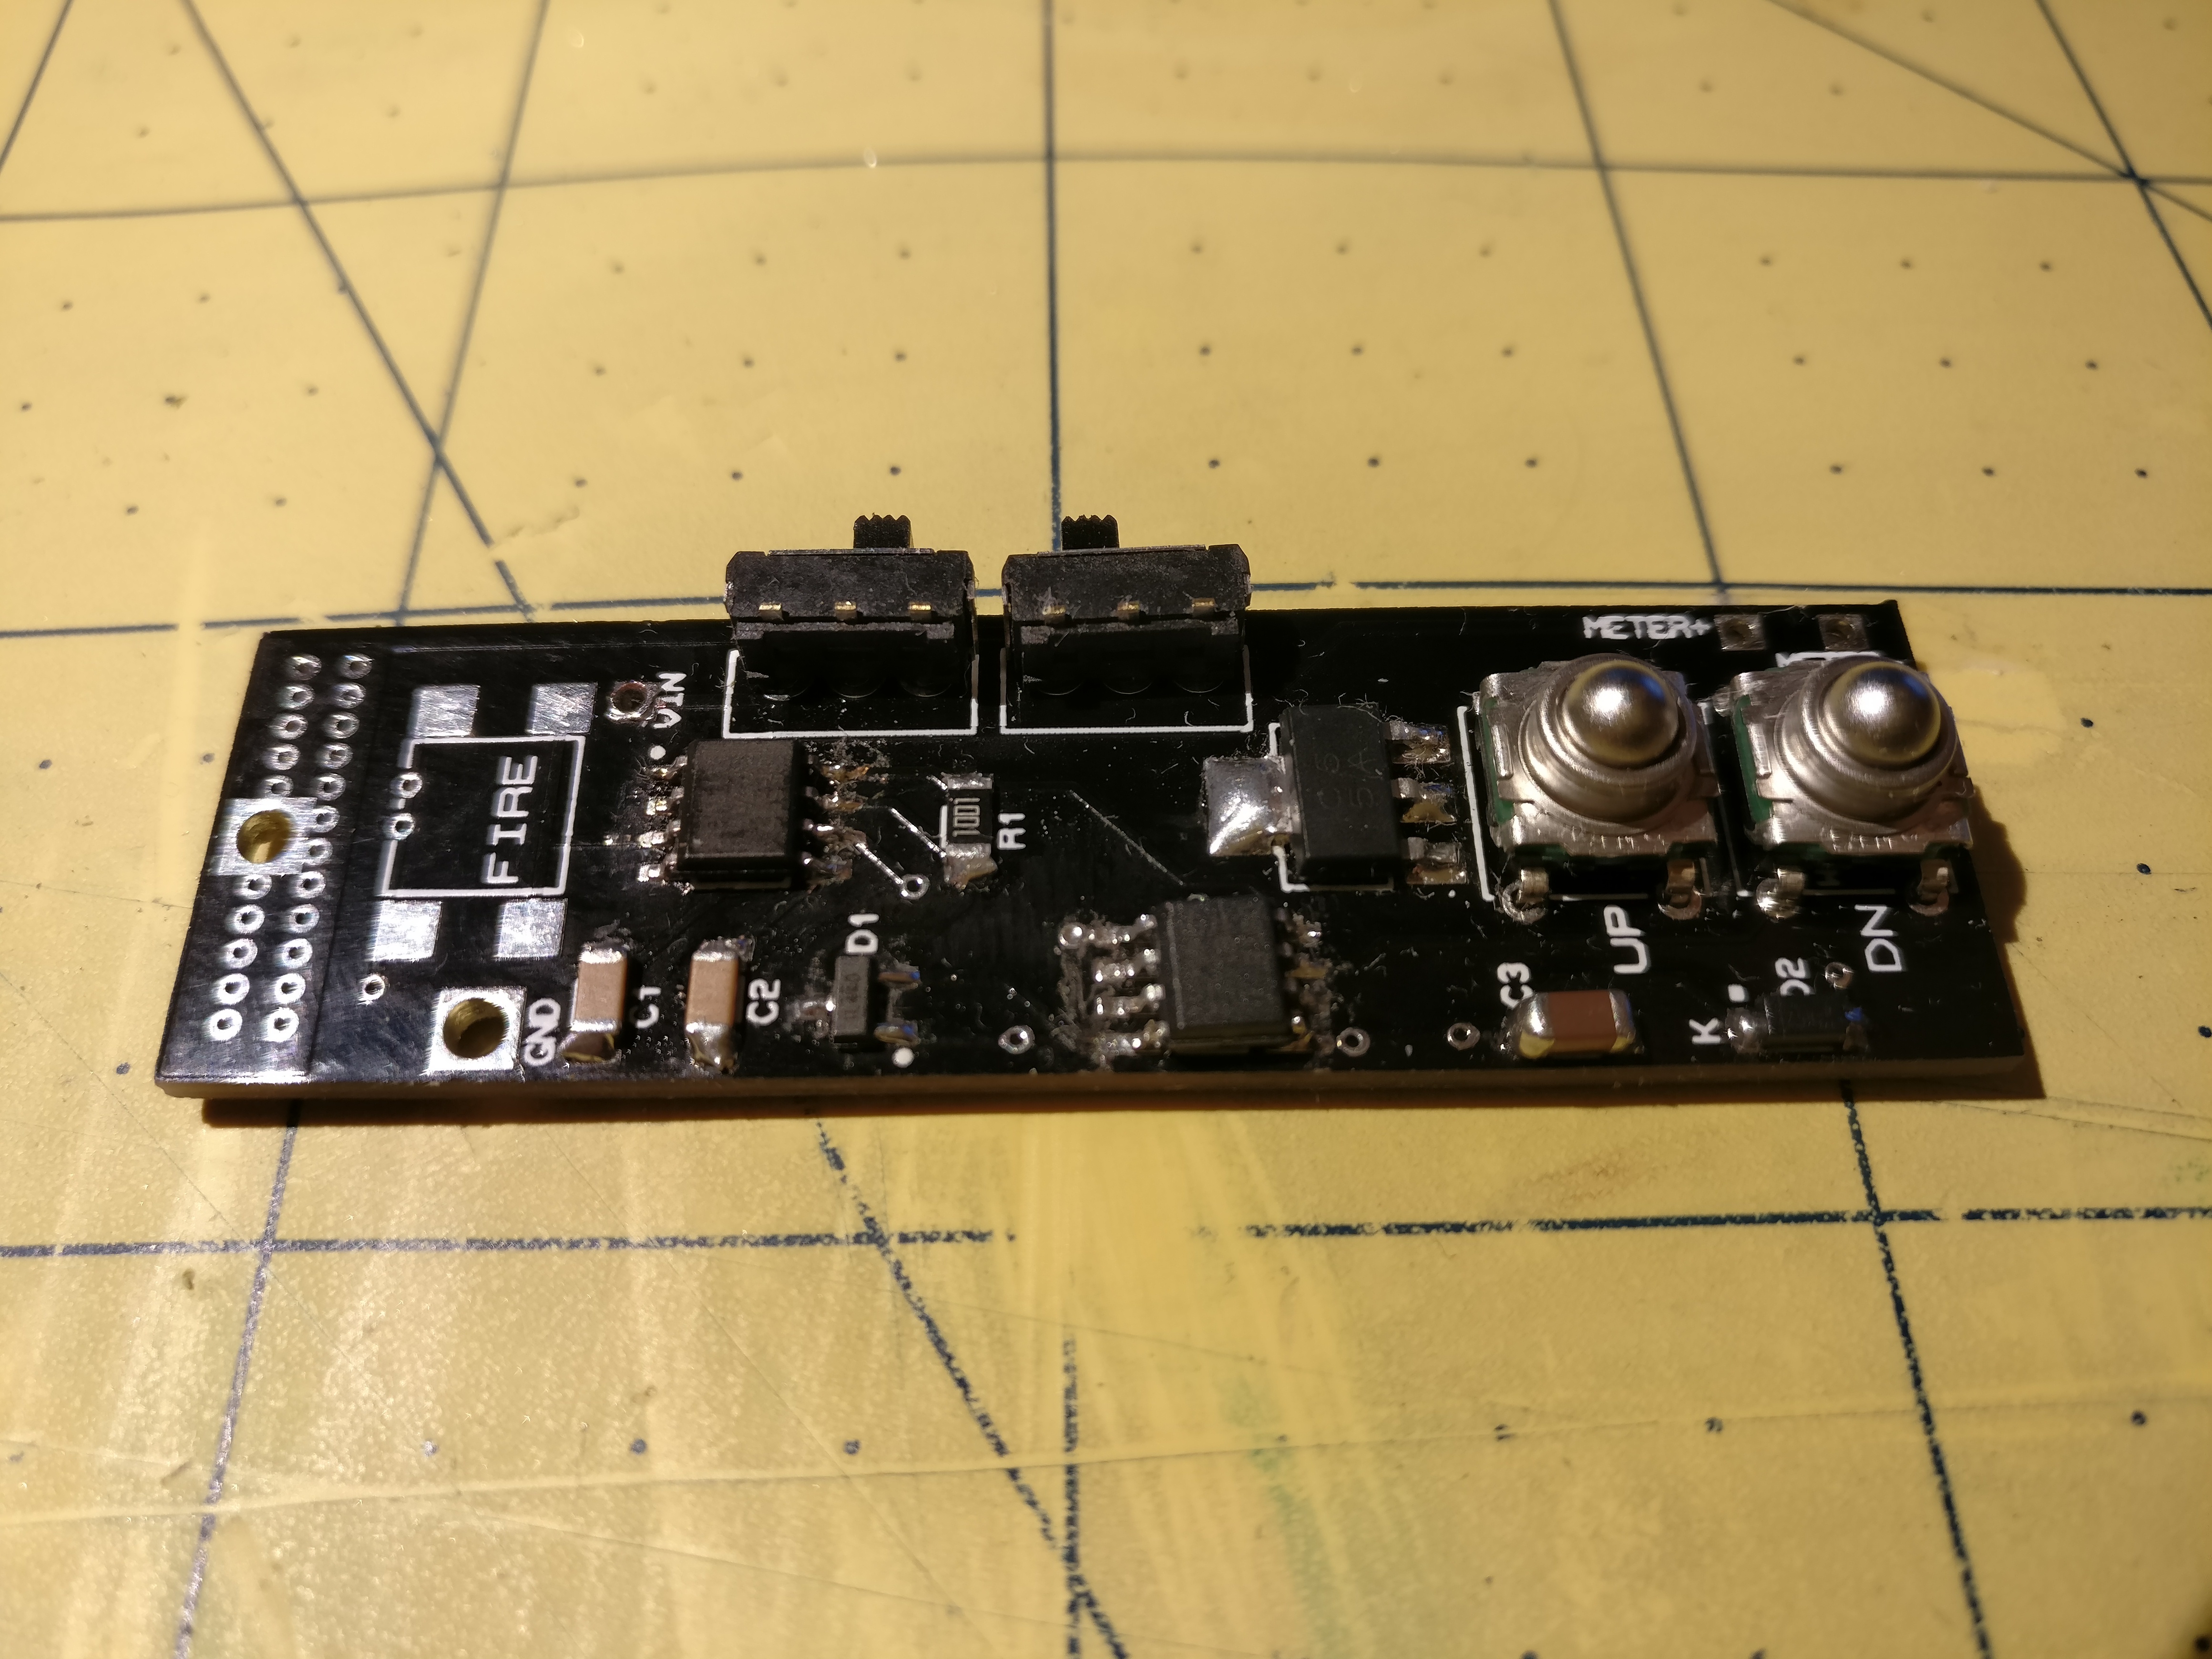
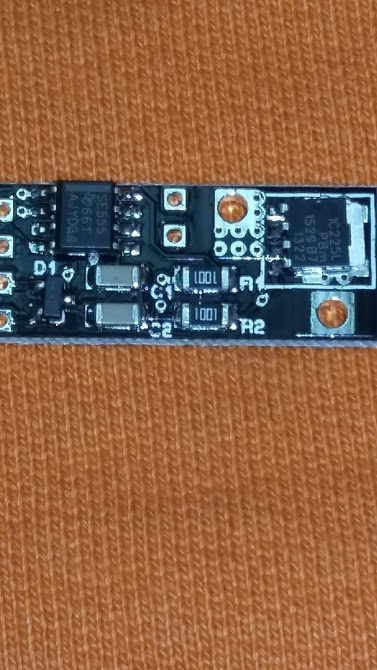
Thanks to @Whiterose0818 i was able to finish populating the last board I’ve bought to find out which kind of technology i want to use for future PWM builds. It was a bare PCB for a PWM driver with a digital pod so it has up/down buttons for the voltage and can be locked etc. The board has been tested and is ready to go into a mod. But there are already problems with this board and I’m pretty sure i won’t be buying it again.
The board is just too long. I could fit it in a wider box behind the 510 connector but in a box wide enough for this board i can fit 3x18650 and for 3S this board is not good enough. You can only use maybe 1.5mm² wire which is good for maybe 100watts.
Mounting it on the side gives you enough space for the voltmeter and the board but you have to use the on-board fire button. There’s not enough space for a bigger fire button.
So… learned a lot the last couple of days. I think for future builds i will use more Big Al’s boards. There’s a sled mounted “intelligent” one now which looks very promising and there are rumors it will be available in the UK soon. I’ve also learned that i should spend more time cleaning devices before i take pictures. I underestimated the camera. And i will have to buy stainless steel versions of the tanks from now on, the black ones look stupid on the blue boxes.
Wow… long post… thanks again to @Whiterose0818 for valuable advise, I’ll definitely keep going and the next steps will involve resin and stabilized wood.
3 Likes
I have plans to dive into this after all the holiday cheer is over. I can’t decide whether to go PWM or DNA75. I do like the idea of the PWM board mounted on a sled for starting out.
1 Like
I have completely read every word, but I’m headed to a dinner with the Queen, so I will revisit at a later time and commend your work.
Also, it’s no rumor, bro…I talked to Francis myself. IPWM boards are en route!
I do have a moment to say that I can appreciate you beating yourself up, because I see that it won’t slow you down. Good stuff…find you later!
3 Likes
The DNA boards are really easy to build as long as you have a proper mount for the display and the board. The sled mount boards only have 6 more cables, 2 each for the fire button, the pot and the volt meter. Trickiest part in any case is the 510 connector.
2 Likes
None of this is tricky…I know an easy way for it all.
If anyone wants an easy board to build with stateside, @mstokens, then try Big Al’s or Gunstar Mods PWM board. Easy enough and so very rewarding! If any of you go that route, I’ll post some pix for you to model your first build on. That’s what I did…I looked at other really clean builds and aspired to do the same!
Either way, i got all ya’lls back!
2 Likes
I’ve been looking at the Alpinetech enclosures. That’ll probably be the way I go to start off.
1 Like
This is the enclosure I’ve used for the 2nd PWM mod. Just had a look at the alpinetechs on ebay and they look very similar.
1 Like
micro pwm v1…very nice!
hows the confidence level?
you ready to do this???
2 Likes
lol… confidence level…say 6 out 10. now that it’s staring me in the face I got a couple of butterflies. I guess I could have drilled holes while I was waiting but for some ocd reason i wanted to have all of the parts. So now I figure out where every thing goes and look at some pictures and measure and…and…
2 Likes
You’re fine…relax.
Here are some tips:
Measure and mark where holes will go…Center punch. If you don’t own a center punch, use a nail and hammer. Drill a small hole with a tiny drill bit first…this is you’re pilot hole. Now drill hole. Preferably with step up bit. Don’t drill too big…you can’t fill in holes. I use mini files a lot.
2 Likes
ya i’m not worried about that part. its the electrical part that makes me a bit anxious. though you’re right about the holes.
1 Like
Solder quick…high heat, get in and out quickly. Leave a little extra wire so you can measure and trim down to little excess. Did you get the pix of my micro pwm build?
no but I sure would like to get them if it’s not to much bother
You were right - the boards have arrived at modmaker. They really do look nice and have all the functions i wanted for a pwm mod. Have you tried a sled mount board behind the 510 instead? Just wondering if that would save space.